

Due to the overwhelming response to Jubilee Ribbon Corsage I made as part of the Abakhan 'Creative Budget' challenge, I have decided to add a tutorial for those of you wish to make one for yourselves. (For those of you who don't or feel they can't, but would love one anyway, keep an eye on my Folksy shop where I hope to be listing some for sale very soon . . . )
So here you go - How to make your very own Ribbon and Button Corsage

Assemble your ingredients
You will need:
12 x 10cm lengths of ribbon
6 x 6cm lengths of ribbon
button centre piece
brooch back
needle and thread
I used ribbon that was 15mm wide. You can use wider or narrower but the effect will be different.

Thread needle with approx 1m of thread, double it up and tie a knot in the end. Take 6 pieces of 10cm ribbon lengths you want to make the first round. You can use the same colour or alternate the colours and/or patterns as wish.
Fold the first piece of ribbon in half an sew a line of small running stitches across the open end.

Do the same with the other five pieces of ribbon. Pull the thread tight to gather the ribbon petals and stitch the last piece to the first to form a circle. Secure with a couple of stitches making sure the thread ends up on the correct side of the work to begin the next row of petals.
Repeat this process for the second round of petals but once you have secured the circle, stitch through the two layers of petals to hold them in place. Try and keep the stitches fairly small and close to the centre but don't worry too much as they will be covered by the next layer...

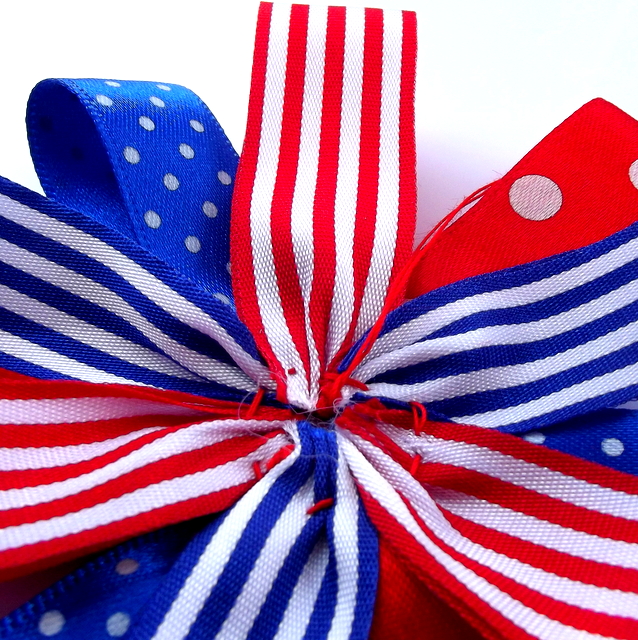
The third round is worked in exactly the same way but using the shorter lengths of ribbon. Join the circle, secure the petals and stitch into place.

Now add your button centre piece. Use one big focal button or layer up two or three for a different look. Make sure your centre piece is big enough to cover up the stitching on your ribbon petals!

Finally stitch your brooch back in place and you're done!
* If you are at all concerned about the security of your stitches or ribbon fraying feel free to add a little fabric glue to the corsage before you attach the brooch back
There you go, couldn't be easier! Try experimenting with different coloured ribbons and different widths too. Why stop at three layers? Start with larger pieces of wider ribbon for the first round - say 16cm lengths - before doing the three rounds shown here for an absolute show stopper of a corsage!


These look great!! Thank you for the tutorial, I might give these a go when I get around to getting some ribbon :)
ReplyDeleteThank you so much Anthea! Can't wait to give these a go! Hope you're enjoying the weekend!
ReplyDeleteVictoria xx
These look great,Just found your blog via the TOTS 100 widget now following :)going to pin these to make on day ...
ReplyDeleteYay! Good to know the widget thing is doing it's job ;-) I have already discovered a couple of new blogs thanks to it :-) Thanks for following x
Deleteso sweet
ReplyDeletexoxo of Paris
This is a great DIY - thanks for sharing.
ReplyDeleteLotts x