Sunday, December 15, 2013

Help! I've lost my Christmas Mojo!!

Anyone who knows me well, knows how much I love this most wonderful time of the year!

I love the glitter, sparkle and twinkly lights. I love the excuse to decorate every available space with festive trinkets I have collected over the years. I love choosing gifts, making gifts, wrapping gifts. Oh how I LOVE wrapping gifts!  I love walking with Roo around the neighbourhood oooo-ing and aaaah-ing at all the pretty light displays that people have covered the outside of their houses with.  I love the excuse to eat mince pies and cream at any time of the day. I love gingerbread lattes. I love wearing my huge velvet Santa hat on the school run. I love baking festive treats and filling the house with the aroma of oranges and spice.

The decorations came out on 1st December. The tree went up and looked very pretty.  I even made a lovely garland for the banisters using a plain 'fir garland' from Wilkos, some battery operated red berry lights I bought locally and some gorgeous vintage style baubles I picked up in the charity shop for 50p (for the bag of 6! Bargain!!)


I had plans for the other rooms too and I was going to make an early start on wrapping with the aim of getting all wrapped up before Roo finished school for the holidays.  I was ready to go!

Then something happened.

I lost my Christmas mojo.  

A series of very quiet weeks at the shop and the van costing us £300 to get through it's MOT didn't help. Neither did a couple of complete disaster craft fairs and a third cancelled due to lack of interest...
Coming home from school run one day to find water pouring through the kitchen ceiling (luckily NOT affecting the bit I had just decorated) pulled me down a bit further and then this week I was completely knocked for six by a flu-type virus that left me almost unable to move for 36 hours!

Oh and the lights on our beautifully decorated tree blew less than a week after putting it up.

And, no I haven't done ANY wrapping yet!

It's all been a bit of a disaster really...

Roo informed me this morning that there are only 10 sleeps till Christmas

10 sleeps!

I REALLY need to find my Christmas mojo again because, you know, I really don't want to have to wait another 12 months before I can feel good wearing my big, red, velvet Santa hat on the school run...

Friday, December 06, 2013

Christmas dream toys - Vtech Innotab3s review

If you have children you will not have failed to notice that Christmas is very nearly upon us.

Letters to Santa are being written and excited shouts during the ad breaks of 'Mummy, look, this is what I would really really like!' call me from the kitchen while I am trying to make tea...

One thing Roo has been very unsubtly hinting at wanting is the brand new VTech Innotab3s - it's one of this year's Dream Toys here at Argos. He has, and loves, the VTech Kidizoom camera so when we got an opportunity to try out an Innotab3s naturally we jumped at the chance!

excerpt from e-book
"RAWSOME" was his first reaction - I think that's good...

Being quite tech savvy for five, he wasted no time setting up his own profile including a taking a picture of himself with the in-built 2mp camera and was swiftly drawn straight to the pre-loaded ebook which kept him occupied and amused for a good 20 mins - no mean feat for a boy with a butterfly attention span!


Once he had explored the various games and apps for an hour or so it was my turn to investigate and install the 'Learning Lodge' onto my own laptop to monitor his progress and as a portal for downloading other apps from the Vtech website.

The installation went fine BUT the Learning Lodge screen was too big for my net book display and I couldn't work out how to either reduce the display size or scroll down so I had to install it onto the home pc as well - slightly annoying but not the end of the world...
Once the Learning Lodge  was installed I was able to explore the Vtech website and the various apps/games/ebooks available to purchase and download.

I have heard a few mums grumble at the prices of the downloads and I was particularly surprised to see that the physical cartridges that you can buy from shops are also available as direct downloads but seem to be more expensive to purchase that way!  Most of the educational games and ebooks are priced between £2.99 and £4.99 which may seem like a lot (and it certainly would cost a fair bit to fill up the Innotab in one hit!) but with most kids comics costing around £3 these days I don't think they are that over-priced.

just tricky enough to keep 5yo busy

Once you have registered your Innotab3s you are entitled to one free download so I let Roo go through the options and he picked a maths game called 'Escape the Dungeon'. Downloading and installing onto the Innotab3s whilst connected to the pc was pretty simple and straightforward. The first level of the game which involves simple adding and subtracting was easy enough for him to get through so he didn't lose interest.

Innotab art...

Roo has been utterly captivated by the Innotab 3s - he is drawing, taking photographs, playing games, reading, listening to some of his favourite tunes that we easily transferred from the pc, using the calculator app and even marking important dates on the calender.  He loves the pre-loaded Magic Beanstalk game that helps kids learn about time management and responsibility. The TV has been ignored as has the Xbox for most part - that's a result in my book!


The one major difference between the Innotab 3s and it's earlier incarnations is the addition of Wifi technology - this means your child can access the internet via their tablet. There are a number of Vtech approved websites already added (and parents can deny access to any they don't feel are appropriate and easily add others). We have only briefly looked at the internet options - it is very slow to load up and does not run any Flash based games or videos - this means that it is effectively unable to cope with most of Roo's favourite websites such as cbeebies and you are also unable to watch iPlayer or YouTube videos which is mostly what Roo likes to do on line. There are cartoons available to download from the Vtech website (including DANGERMOUSE!!!) but you do have to pay for them obviously.
The Innotab3s can also send and receive messages to pre-approved iPhones or Android phones - as we don't have either (yes really!) I haven't been able to investigate this feature properly

The Good Stuff


The Innotab3s was easy to set up, comes with rechargeable batteries and a selection of pre-loaded games and apps than can be added to easily via the Learning Lodge. Parental controls are easy to set up and monitor.  The tablet is easy to use, and an attractive child friendly design that appeals to younger children and will also withstand a certain amount abuse that it is likely to receive at the hands of your average 5yo! The quality of the games and ebooks we have seen so far is good and the sound quality is excellent.

The Bad Stuff


The web browser was incredibly slow to load and, due to the lack of Flash player, the majority of the things Roo likes to do online were not available to him through the Innotab3s. Which means he will still be hassling me for my net book...  
The library of down loadable apps/cartoons/ebooks is not huge (although it is growing) and neither are they that cheap!
Not being able to use the Learning Lodge on my net book because of display sizes is annoying!


Overall the Innotab3s seemed to live up to all of Roo's expectations. He has been playing with it at any given opportunity and particularly likes that he can take it with him to play with on the go. I am happy with the educational content of the games and the fact that it keeps him occupied and happy so I can get on with making the tea!

The post was produced in association with Argos.


Friday, November 29, 2013

Kitchen Makeover (on a budget) pt 1

There is something about this time of year that really makes my nesting instinct kick in. I want cosy. I want comfort. And most importantly, once December kicks in I want sparkle, twinkle and glitter...

Food is very much a focus over the festive period too (which, in this house at least, runs from the beginning of December all the way through to the second week of January! ) which means spending more time in the kitchen so if there's one thing I don't want it's a messy cluttered kitchen!  Unfortunately my kitchen, tiny as it is, has a tendency to get messy AND cluttered whenever I turn my back for 5 mins.

Time to take things in hand!

I wasn't intending on redecorating the kitchen this winter (to be fair I was actually intending to do it during the summer but just never got around to it...) but, well the urge took hold and sometimes you just have to go with the flow.

I simply don't have the time to do the whole lot in one hit so I have decided to tackle one wall at a time and work my way around.  This week I did the window wall.


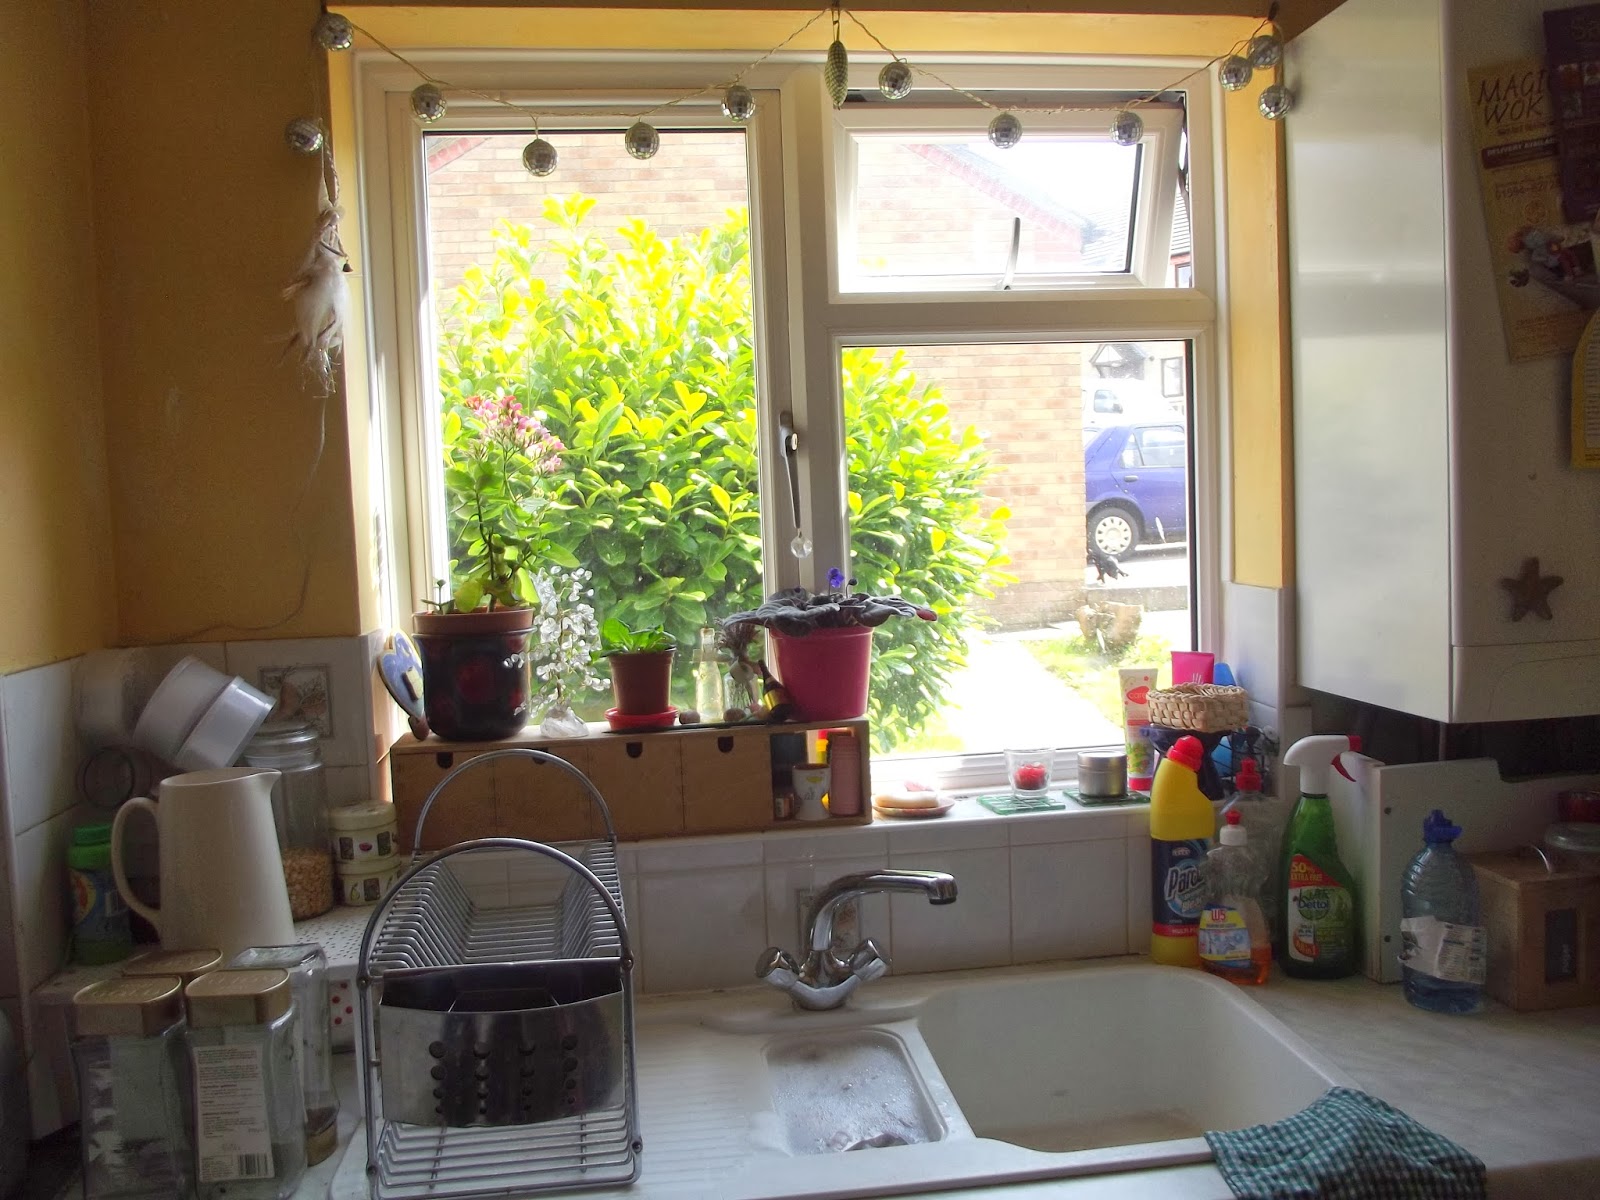
Here's how it looked before - the yellow seemed like such a good idea at the time but the kitchen (like the rest of the house) just doesn't get enough light so instead of looking warm, bright and sunny, most of the time it just looks a bit dark...


One coat of paint (Dulux Natural Calico if you were wondering) and it's already brightened up a bit. It makes the white boiler look less conspicuous too which can only be a good thing...


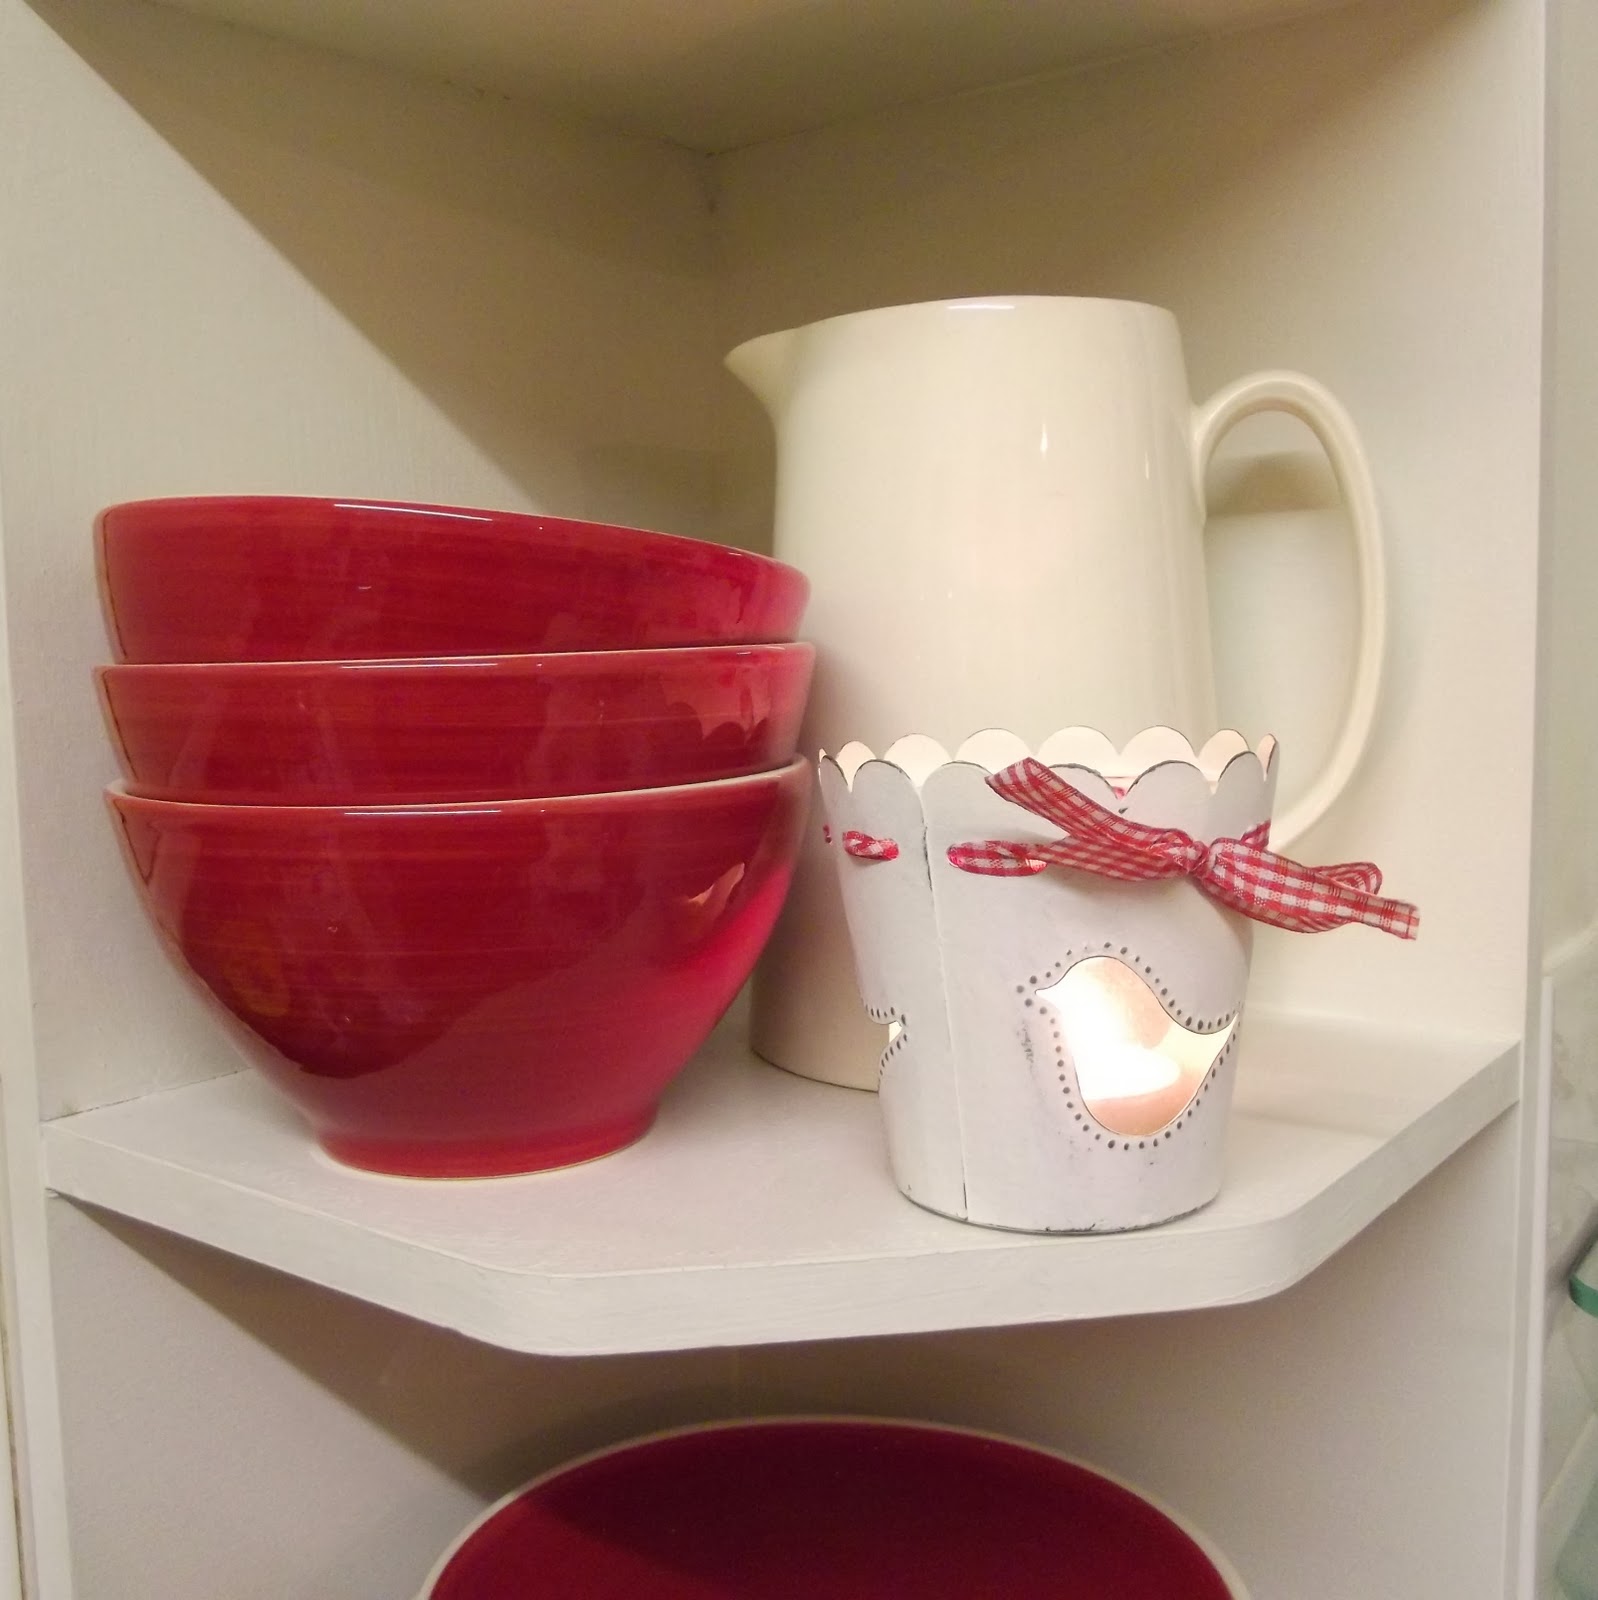
I picked up this corner unit from a charity shop for £2. A couple of coats of Annie Sloan Chalk Paint in Old White transformed it. I love chalk paint - you can pretty much paint anything with and, although a bit pricey, the tin just seems to go on forever!


It scrubbed up lovely don't you think? I am currently loving the red, white and sky blue colour scheme but the best thing about a white back drop is it's easy to change accent colours when I fancy something different.


The red and white crockery is from Matalan. The cute little birdie tea light holder was purchased in the sales after last Christmas and the lovely tall pitcher was a charity shop find.


My lovely little white witch was a Christmas present a couple of years ago. She's now hanging in pride of place and watches over me while I do the washing up.


 These two glass shelves came from my mum. I've used little pressed glass sundae dishes (another charity shop find) as supports. There is just enough room to display a few little trinkets I picked from elsewhere in the house. I will probably put some pots of herbs on the top shelf in the summer but it will, very soon, make a perfect stage for Christmas candle holders, pine cones and glittery reindeer...


It's amazing what a transformation can be made with a bit of paint and lot of de-cluttering!

The rest of the kitchen still looks rubbish but now I've made a start I'm itching to carry on. Hopefully I'll be able to show you Cute Kitchen Makeover part 2 next week...


Candle light and disco ball fairy lights.
Just because!


Tuesday, November 26, 2013

Scrummy Chocolate Orange Cake recipe

You may have noticed I have a slight obsession with traditional home baked cakes and puddings.

Duerr's - producers of jam, marmalade and peanut butter of extreme yumminess who have already featured a couple of times on this blog - have obviously noticed this too and sent me some more of their lovely jams and asked me to test out a few more recipes from their 'Baking for Boys' series on YouTube.

I was more than happy to oblige!


Last weekend we made the gorgeous Victoria Sponge with Raspberry Jam and Cream - it was lovely. In fact it was so lovely we kind of got carried away and ate it all before I had a chance to photograph it for bloggy purposes... oops!

On Sunday we were heading over to the inlaws for a family Sunday dinner so I thought it would be the perfect opportunity to try out another recipe in the series - Chocolate Orange Cake. I can tell you it went down an absolute storm. And I actually managed to take a photo or too before everyone tucked in...

Scrummy Chocolate Orange Cake

Ingredients

 For the cake
100g softened butter
50g cocoa powder
90ml warm water
3 large eggs
300g caster sugar
175g self raising flour
1 rounded tsp baking powder
zest of one orange
 For the icing
150g good dark chocolate
150ml double cream
some Duerr's Fine Cut Orange Marmalade

Method
Place the cocoa powder in a large bowl and mix to a paste with the hot water.
Add the eggs then the butter and mix it in.
Stir in the sugar (but don't over stir it!) before adding the flour and baking powder.
Finally add the orange zest.  If the mix seems dry add a little milk to loosen it up.

Pour into two prepared cake tins (I used the liners like the ones used in the video but you could just grease, base line and flour the edges of each tin)

Pop them into a preheated oven 170c/GAS5 for about 25 mins.

While the cake is baking break up the chocolate and put it, with the cream into a bowl placed over a pan of water. Heat the water gently to melt the chocolate into the cream. Once it's all melted remove from the heat and allow to properly cool, for about half an hour, giving it an occasional stir.

When the cakes are done, allow to cool for a few minutes then sandwich together with a big dollop of marmalade. Smooth some more marmalade over the top of the cake and then cover with the cooled chocolate ganache (posh name for cream/choc mix ;-) )

If you want you can grate more chocolate over the top to decorate.

The original recipe called for Apricot jam in the middle but I wanted a full on choc orange experience so went with marmalade all the way - it was well worth it!

To watch the boys baking this cake check out the video below...


As you can see this show stopper is dead easy to make and the smell as it was baking was heavenly!
Also, I can guarantee there won't be any left overs for later unless you stash a slice in the fridge, behind the butter... *cough*

Happy Baking!

Thursday, November 14, 2013

Make a Spotty Tshirt for Children in Need

'Mummy, have I got something spotty to wear? We can wear something spotty to school on Friday for Children in Need'
For a child whose mother is ever so slightly obsessed with polka dots, Roo has a grand total of no spotty clothes whatsoever! Not a problem, says I, you have some white tshirts we can customise. And then I completely forgot about it.

Until this evening when Roo reminded me that he needed something spotty to wear to school. Tomorrow.

Here's what I did...


How to make a Spotty Tshirt for Children in Need in less than 15 minutes because you completely forgot to do it earlier in the week....

You will need

1 tshirt
a piece of fusible webbing (Bondaweb or similar)
scraps of coloured fabric
something round to use as a template (I used one of those dosing cups that come with EVERY bottle of washing liquid I buy...)
Scissors
Iron


First draw some circles on the paper side of the fusible webbing and cut roughly around them.


Place it, sticky side down, on your fabric and iron in place.


Cut out your circles.


Position your circles onto your tshirt until you are happy with the arrangement


Peel of the backing paper and iron the fabric circles to your tshirt


Put tshirt on and wear with pride whilst helping to raise money for Children in Need!


I do apologise that this is a bit last minute but, you know, that's just how it happens sometimes...


Thursday, October 31, 2013

20% off at My Favourite Magazines!

Who doesn't like curling up with a good magazine and a cup of tea?
Magazine subscriptions are a great way to keep up with your favourite magazines, often receiving them before they are available in the shops. They also make fantastic presents!

My Favourite Magazines - who sell subscriptions to Mollie Makes and The Simple Things along with many other titles and one-off bookazines - have a very special offer over this weekend - if you spend over £50 on any of their products you can have an extra 20% off your order. Just enter the voucher code EXTRA20 at the checkout.

Offer valid between 31st October and 4th November 2013

What are you waiting for?


*I am part of the myfavouritemagazines.co.uk affiliate scheme - that means I earn a small commission for every sale made through this blog.  Thanks for your support x

Tuesday, October 29, 2013

#WIPsLinky No.4 - Christmas is a coming...

Did you know there are only 8 weekends left til Christmas?

That may be enough to strike fear into the heart of many a crafter - especially if, like me, you plan on giving everyone at least ONE Christmas pressie produced by your own fair hands!!

So most of my works-in-progress this month will be Christmas pressies - which means I can't show you them here as some of the recipients read my blog! (however they don't use Twitter so I may be able to share some on there - search the #WIPsLinky hashtag if you are feeling nosey!)

Now there is a definite nip in the air I would love to get back to working on my patchwork cable blanket. I have only managed one more panel since I mentioned it last and I suspect very little further progress will be made this side of Christmas!  Ah never mind - plenty of time to cosy up with blanket making in the New Year . . .

Last month's main work in progress was the fab retro dance dress I was making for the 60's Dance and Joe Meek celebration at Newent which was last weekend.


You'll be pleased to know I managed to finish the dress - sewing on the last button just hours before I wore it and danced the night away in it!  I was a little nervous that the poppers holding it all together would unpop in the middle of the Twist but it all held together!

the dress was made like an apron - over the head then the back wrapped round the front

not the best picture - but you get the idea...

 Making my own dress was immensely satisfying - I will definitely be doing it again!  Now I just need to hunt out some cool patterns...


What are you up to this month? Have you started Christmas crafting yet?

Blog your current works-in-progress and link up so we can all see what you are up to - there's nothing like going public if you want to avoid projects falling by the wayside unfinished...  (trust me!)

As usual I will add all your projects to my #WIPsLinky Pinterest board too - it's becoming a little #WIP treasure trove!!

Happy crafting!


Wednesday, October 23, 2013

Time to focus...

You may have noticed I have been a little quiet over the past couple of weeks.

This is mainly because I have been pretty busy trying to get my dress finished for the 60's dance and getting a couple of large Sweet Kitty orders started but also, after my post last week about what makes a good blog, because I have been having a long hard think about what I actually blog FOR and where I see myself and this blog heading over the next year...

Truth is I need to be making some money ( which reminds me - see that Mollie Makes banner at the top? If you click on that and subscribe to Mollie or any of the other magazines available I get a small commission. It all helps.) Trouble is I don't drive and live out in the styx so the only real job opportunities that are open to me are stacking shelves in the local supermarket or care work, neither of which really appeal...   I already have a part time job book keeping for my other half's motorbike shop and I do a day's cleaning every couple of weeks. I recently took in some ironing for a friend who is just too busy (and hates it anyway) and will be doing that regularly too but what I REALLY want to do is earn a living - or at least a regular income - from Forest Flower Designs.   I love designing and making my products. I get a warm glow every time someone else likes them enough to part with their cash and take them home. I really want my little Forest Flower to grow and grow and grow...


With that in mind I have set up a new blog - dedicated not just to Forest Flower Designs but to handmade business in general. I know I could have just posted more FFD posts on this blog but I really felt it deserved a home, and a URL, of it's own.

So now it does - www.forestflowerdesigns.co.uk 


I will still be blogging here (albeit not quite as regularly as before). It's taken me best part of 4 years to build this blog up to the place it is now  and I am not about to abandon it just yet! I still have plenty of makes, tutorials, recipes, days out and reviews to share with you but from now on I will be focusing my energy on growing my business and getting my own little brand of handcrafted cuteness into as many homes as possible.

I would love it if you would join me - my google friends box is looking a little empty right now although I'm sure it will fill up in time - I can't wait to share my new designs and inspirations with you not to mention all those other fabulous crafty businesses out there! 

Thanks for your support, dear readers, over the past 4 years and here's to many more blogging years to come!

xx

Wednesday, October 09, 2013

What makes a good blog?

image courtesy of Nujalee/FreeDigitalPhotos.net
If you are on Twitter you may have come across 'Twitter chats'. Usually based around a particular theme, hobby, interest or TV program and usually accompanied by their very own 'hashtag' to enable users to follow the conversation.

Tuesday nights see not one but two Twitter chats I like to make an effort to follow - #craftblogclub I have mentioned before, hosted by Emma @livepeachey and #CBUK hosted by Hillary at @craftbloguk 
Both chats are aimed primarily at craft bloggers (although if you are looking to find NEW craft blogs to read then these hashtags are a great place to start), and both are a great source of inspiration and advice.

Last night's #craftblogclub chat was all about Pinterest. You know how much I love Pinterest - it's a great place to store ideas and get inspiration! You can read Emma's round up of that chat here.

#CBUK concentrated on the tricky subject of engaging readers.
The whole point of blogging for most of us is that we are sharing our thoughts, images, ideas, knowledge with the world wide web (does anyone actually still use that term?). In return we like to see that people are interested - whatever people say about not caring about the stats, in the end we want people to visit our blogs, look around, comment and, perhaps most importantly, subscribe, follow and come back another time.

Now I am not one to worry myself too much about keywords and SEO - I like to think I write descriptively enough for searches to find me and I always make sure I use a number of different phrases within each post to ensure that I have covered several search options. For example my tshirt yarn projects posts include phrases like 'tshirt yarn projects' 'tshirt yarn tutorial' 'making tshirt yarn' 'crochet with tshirt yarn' and 'recycling tshirts' - phrases I would hope anyone actively searching for tshirt yarn related blog posts might use.  That said I have had more vistors to those posts via the images I have pinned on pinterest. I know there is room for improvement and I realise I am going to have to take SEO a little more seriously if I am to get more visitors...

But once they are here, how do we keep them here, get them to contribute and better still get them to return?

I don't know if there is a set formula that works - great content obviously is the key. You have to be writing stuff that people WANT to read or else they will just click away. Great images help tremendously, particularly if you also use Pinterest to promote your blog. I have noticed a distinct upturn in visitors via Pinterest over the last few months - never underestimate the power of a beautiful photograph, particularly if it illustrates a tutorial/recipe/how to!

But most importantly you must LOVE what you are doing! If you're not mad keen on your latest blog post how can you expect anyone else to be? Content written because you feel you HAVE to will never be as good as content written that you really love/believe in.  I have always said that when blogging becomes a chore it's time to step back and re-evaluate.

So what do you think makes a good blog?
What makes you hit the 'Subscribe' button? (top of right hand column by the way ;-) )
What makes you want to keep coming back?

I would love to hear your thoughts!

Monday, October 07, 2013

Tshirt yarn projects - crochet bowl

So this month I am mainly obsessing over tshirt yarn!

I think there is another blog post in there somewhere but today I am going to show you how to make this cute little tshirt yarn crochet bowl. These bowls make great dressing table tidies - fill em up with hair bands or cotton wool balls.  Or sweeties (it is ok to have sweeties on your dressing table, isn't it?) or, as I have done, with hazelnuts Roo collected from Nonny's garden...

The original pattern I used for this bowl on can be found here - I have just converted it into UK crochet terms.

You will need


One large tshirt made into tshirt yarn
10mm crochet hook

crochet terms - ch = chain    htr = half treble  ss = slip stitch

R1  ch3, join to make a ring. ch2 (this counts as first htr) 9htr into ring, ss to 2nd ch to join
R2  ch2, htr into same stitch, 2htr into each stitch, ss join to 2nd ch (20 stitches)
R3  ch2 *htr in next stitch, 2htr in following stitch* repeat to end, ss join to 2nd ch (30 stitches)
R4  ch2, htr into each stitch to end, ss join to 2nd ch

repeat round 4 as many times as you like until you reach the desired depth of your bowl. The bowl illustrated has 4 repeats.

And there you have it.

Use narrower strips of tshirt yarn and a smaller hook to make a smaller bowl.
Or double up the yarn and use a HUGE hook for a super chunky bowl that could serve as a toy tidy.
Make a set in toning colours or even dye plain white shirts before cutting them up to perfectly co-ordinate with your decor.


The best thing is you are turning something old into something lovely and new...and useful too! 

Like this project? Keep your eyes peeled (or better still follow this blog via bloglovin ) for more tshirt yarn projects coming soon!

Happy Crafting x


Thursday, October 03, 2013

DIY T-Shirt Yarn - joining short pieces

I have some exciting news! I have been asked to participate in a crafty workshop at this year's Forest Showcase!

Lydney Dial-a-Ride - a local charity I have close connections with - have an entire marquee at the show with the aim of educating people about what charity shops actually do! What happens to the items you donate and where the money raised from sales is spent. The manager, Louise, has asked a few of us crafty types to come along and show people that you can do so much more with your charity shop purchases than just wear them off the rail...

My demo will be on recycling old clothes and turning them into beautiful things for your home.

And where better to start than with how to make Tshirt yarn!

The concept of recycling tshirts into a yarn to make something new with has been around for a while. There are lots and lots of tutorials out there showing you how to create a continuous length of yarn from a tshirt (here's a very simple tutorial from Mollie Makes  )

But these tutorials assume that your tshirts are essentially a tube with no side seams. This method of tshirt construction is more commonly seen in men's tshirts as women's tend to be shaped to accommodate (or accentuate) our curves so unless you are lucky enough to have a fella who doesn't mind you shredding his trusty tees finding the right shirt for this method can be tricky.

I have been scouring local charity shops for this project and so far have found only one shirt with no side seams so I really needed to find a way of joining the strips together securely but not too bulky. Machine stitching them together is time consuming so why not try this method...

First you will need to cut your tshirt into panels - cut across the body, just under the armpits. Cut the hemmed piece off the bottom and cut the two side seams out. This should leave two rough squares of fabric.


 Cut these into strips across the width of the fabric. You can cut the strips as wide or as narrow as you want - it depends on the project you have in mind. Just remember that the wider the strip, the chunkier the finished yarn will be (and the less you will get from each shirt!).  I wouldn't recommend cutting any narrower than about 1/2" or 12mm...


 Take two strips and lay them end to end - don't worry too much if they are not exactly the same width... 


Cut a small slit in the ends of your fabric strips


Take one fabric strip (1) and pass it through the slit in the other fabric strip (2)  ...


...then take the other end of strip 1 and pass that through the slit you cut in it...


... and pull!

This creates a good firm join. Once you have joined all the strips you can then pull the strip as for the continuous lengths to create the yarn.

Now you have no excuse not to recycle all those old tshirts whether they have side seams or not!

the start of a t-shirt yarn crochet rug using 10mm hook

I have really enjoyed turning old tshirts into yarn and it is intensely satisfying then turning that yarn into something completely different.  I hope to show off a few finished articles very soon and am planning a couple of simple tutorials - including the crochet rug pictured above!

In the meantime - why not pop along to the Forest Showcase on Sunday 6th October at Speech House, Forest of Dean, join me on the hay bales and learn how to turn rags into rugs! 


Monday, September 30, 2013

A 5:2 Pep Talk...

Cast your minds back 10 weeks or so - those halcyon days pre-summer holidays where we were all enjoying the sunshine and hoping that perhaps this year we might actually get to wear flipflops and summer dresses and NOT freeze to death/look like drowned rats before the end of the day...

I was 6 weeks in to the Fast Diet - you know, the one where you eat very little for 2 days a week and eat 'normally' the rest of the time? I was doing alright, had already lost over half a stone and had calculated that, at that rate, I would be back to my pre-pregnancy weight by the end of September.

Fast forward to the end of September...

Guess what folks? I am nowhere near my pre-pregnancy weight (now there's a surprise!).

So what happened? you ask.  I'll tell you.

THE SUMMER HOLIDAYS HAPPENED!

Now I can't blame it all on having Roo home for six weeks but have you ever tried fasting with an uber energetic 5yo bouncing around the place like Tigger after a big bag of Haribo?  Fasting whilst he is at school is easy (ish) because you don't have that constant 'Mummy, I'm hungry! Can I have...?' in your ear from breakfast time right the way through till bedtime. 

Then there were the days out that usually required a picnic of some description if we didn't actually eat out, at least one ice-cream and the obligatory coffee (for me), milkshake (for him) and cake. Obviously.

We actually went on holiday too, to Devon, which meant a week of ice cream, cream teas, fish and chips and pasties. Plus a week with my mum and dad - who view fasting as some kind of torture and manage to pile more calories on one dinner plate than I generally eat in an entire day!

With all this going on it's amazing I only gained 2lbs throughout the entire holiday!

But now the hols are over, Roo is back at school, I have goal to reach and the clock is ticking...

5:2 began in earnest again last week - I have got back into my routine with relative ease (although the second fast day was a bit of a nightmare - time of the month and no chocolate? *shudders* ). The 2lb gain has gone again already and I am ready say good bye to the other stone and a half over the next few months. The next 4 months, to be precise.

They say it's always helpful to have a specific goal in mind whatever you are doing. It helps to keep focused if you know exactly where you are heading.

I know exactly where I am heading. In 4 months time I reach a milestone and I am absolutely determined I will not be fat AND forty...


Thursday, September 26, 2013

Craft Blog Club Challenge - Cover a notebook

A few weeks ago I spotted something new on Twitter on a Tuesday night.

#CraftBlogClub - hosted by the lovely Emma of Life is Peachy every Tuesday between 7 and 8pm - gives crafty bloggers a chance to chat about craft blogging, offer advice support and generally have a bit of a giggle. Emma tries to keep us focused on a theme each week (she also does a fantastic write up on her blog afterwards covering the main points talked about) and also sets us a monthly challenge. As there are so many different craft bloggers, each with their own niche, it's a great idea to get us all to offer up our own interpretation of a theme...

This month's challenge was to cover a notebook.


I chose to use a simple method I have used many times before but with a little twist, trying something new is what keeps things interesting right? I wasn't sure how well it would work but I am pretty pleased with the results!


You will need


Fabric - measurements depend on the size of book you wish to cover

one piece of main fabric
one piece of iron-on, medium weight interfacing (not essential but a good idea if you are using a light fabric)
one piece of contrast fabric

Ribbon for the spine trim
Ribbon for wrap around tie
matching button

Measuring up - your main fabric needs to be (4x the width of the front cover ) + the spine measurement  x the height of the book + 4cm
The contrast panel needs should be the same height as main panel and a bit less than half the width.

so for my A5 note book the main fabric measured (4 x 10.5cm) + 1cm  by (15cm + 4cm)
or 43cm x 19cm  and the contrast panel 20cm x 19cm

Cut the piece of iron on interfacing 1cm smaller all around - so in this case 41cm x 17cm - and place it centrally on the wrong side of your main fabric. Iron into place.


Press a 1cm seam along the 2 short edges and sew it in place (you'll see in the picture that I folded a hem on the long edge too - I'm not sure why, it's not necessary. I must have had a brain melt at that moment ;-) )

Fold the fabric in half length ways to find the centre point that will sit on the spine of the book.
Cut a length of wide ribbon - I used this lovely 20mm  Whitby Stripe by Jane Means - the height of the book + seam allowance (so, in this case, 19cm) and stitch it into position down the centre of your cover.


Now place your notebook, open, on the right side of the cover, making sure the spine is aligned with the ribbon. Fold each end over the notebook cover.


 Slide the notebook out of the cover and then take your contrast panel and pin it, face down, centrally so it covers the gap between each folder over end. (Again, no need to fold that little hem over like I have in the photograph - however you could fold over and hem the two shorter sides if your fabric is particularly easily frayed)


Stitch across the two long edges with a 1.5cm seam allowance. Trim the seams then turn through.


 Press the cover and slide the notebook into it's new jacket!

Adding ribbon loop and tie

Cut the ribbon approx 3 x the width of the book. I used a lovely cream and baby blue stripe ribbon from the Jane Means collection.

Seal the ends by holding it close (but not too close!) to a naked flame.The heat melts the fibres and stops the ribbon fraying.


Fold over one end to form a loop and stitch a button in place, sewing through the two layers of ribbon


Take a few stitches through the top layer of the book cover to secure (you might want to leave the book in the cover while you do this so you don't end up stitching right through the cover. Like I did...

Wrap the ribbon around the book and tuck the loose end through the loop.


Add a pen and pop it into your bag for stylish note taking on the go :-)


Happy Crafting!

Tuesday, September 24, 2013

#WIPsLinky No3 - Retro Rockabilly

Hello everyone! I can't believe another whole month has flown by!

I don't know what the weather is like where you are but here in the Forest of Dean we have woken up to thick fog every morning for the last four or five days. The school run is decidedly damp and my hair has gone into uber frizz mode!

The Autumn Equinox has passed which means that the nights are now longer than the days. Summer is over. The evenings are drawing in. Time to snuggle up on the sofa and craft by candle light... (although, to be fair, for most of us it's craft by TV light! ;-)

The crochet high tops I told you about last time are coming along well - I am about two thirds of the way through the second one now so hope to be able to share them soon. One good thing has come from all this extra crochet - I have finally mastered the correct way of holding yarn and hook. It really speeds things up and my hands aren't cramping up like they were before. Which means more crochet can be done! Yay!!


This month however I have a special project to get going on.  I am part of the team organising a very special event in Newent over the weekend of 18th - 20th October in the town of Newent, the birth place of the pioneering song writer/producer of the early 60's Joe Meek. His best known hit was 'Telstar' by the Tornados - the first record by a UK band to top the Billboard 100 in the US! NME even proclaimed him the NO1 most influential producer EVER! No small claim to fame.  

What does all this have to do with #WIPsLinky? I hear you ask. Well, as part of the team I will be attending the main evening event - a 60's Dance night headlined by the original Tornados (ok, not all the original Tornados) and part of the deal is that we have to dress to impress! So this month I will mostly be attempting to make me some Retro Rockabilly style!


I absolutely love this pattern - it's a little different to all the other dress patterns I researched. Lets have a closer look...


It's made as a wrap around style which means NO ZIPS (this is a bonus as I hate putting zips in! ) and the pattern difficulty level is described as 'very easy'.

We'll see.

To be honest I am absolutely terrified. I know it's silly, I have used my sewing machine practically every day for the last five years but I only ever sew smallish things. This dress uses a lot of fabric which I am seeing as a lot of potential to go wrong!  I can't wait to get started though!

So what projects have you started this month? Do you have anything special planned for October? Blog it, link up and share your works-in-progress with us all - there is no better incentive to get things finished!!
Don't forget you can use the hashtag #WIPsLinky when you share your post on Twitter/Facebook/Google+ too.

p.s. This month I will also be working on a #WIPsLinky badge that you can all add to your blogs if you choose. Look out for that next month x

Happy Crafting


Related Posts Plugin for WordPress, Blogger...
Blogging tips