Knitting for the men in your life is renowned for being a bit tricky.
Take my Other Half for example...
He mostly lives in combats, tshirts and hoodies. In black (or, to paraphrase Lego Batman, ' very, very dark grey'). He would not be seen dead in a fair isle sweater. Or any kind of sweater to be honest!

Showing posts with label Handmade Christmas. Show all posts
Showing posts with label Handmade Christmas. Show all posts
Wednesday, December 10, 2014
Wednesday, January 01, 2014
#Craftblogclub Secret Santa
Back at the very beginning of December the lovely Emma over at Life is Peachy organised a Secret Santa for all the #craftblogclub Twitter chatters who wanted to take part (well done Em, you did a fab job matching us all up and making sure everyone got the right addresses to post to!)
My Secret Santa gift was to go to Kate at Crafts on Sea and I spent many hours pondering what to make for someone who seemed to a pretty accomplished craftswoman herself! In the end I decided to make a covered notebook, using the same method I used for this tutorial a couple of months back.
I used lovely wool mix felt in grey marl and some gorgeous blue linen fabric that used to be a shirt (I do LOVE reusing old clothes to make new things!) for the lining and an embroidered applique patch on the front. I know Kate has been going through some exciting changes this year with a new baby and a new shop so I thought a little notebook to jot down all those hopes, dreams and ideas would be just perfect!
Unusually for me I completely failed to take any pictures whatsoever of the notebook before or after I had wrapped it up to send! (I was in a bit of a pickle most of the way through December though so maybe it's not too surprising...) Luckily Kate has blogged about it with some lovely photos - please, do hop over and take a look
I know you are all dying to now what I received from Secret Santa....
Check out this gorgeous little bundle of loveliness from Laura at Made Peachy!

Not just one pressie but four! A lovely handmade felt stocking with huge jingle bells in my favourite festive colours, a bar of handmade soap (that smells yummy) and a candy cane to nibble on. Laura had obviously done her research and knew how much I loved all things kitty and made me a covered notebook too! I adore the kitschy little kitty on the front. The back of the cover shows the back view of the kitty - sooooo cute :-)
There was a lovely little notecard enclosed too (Laura, if you read this - where did you get that notecard from? It is just beautiful!) sealed with wax which cracked delightfully when I opened it. I am definitely getting me some sealing wax and a stamp in 2014 - it is so much more satisfying than just ripping open a normal gummed envelope!
Thank you so much Laura - I am blown away by your thoughtful gift!
And thank you Emma for having the idea and organising us all - you are awesome!!
I hope you all had a fab Christmas and Santa brought you all lovely gifts too!
My Secret Santa gift was to go to Kate at Crafts on Sea and I spent many hours pondering what to make for someone who seemed to a pretty accomplished craftswoman herself! In the end I decided to make a covered notebook, using the same method I used for this tutorial a couple of months back.
I used lovely wool mix felt in grey marl and some gorgeous blue linen fabric that used to be a shirt (I do LOVE reusing old clothes to make new things!) for the lining and an embroidered applique patch on the front. I know Kate has been going through some exciting changes this year with a new baby and a new shop so I thought a little notebook to jot down all those hopes, dreams and ideas would be just perfect!
Unusually for me I completely failed to take any pictures whatsoever of the notebook before or after I had wrapped it up to send! (I was in a bit of a pickle most of the way through December though so maybe it's not too surprising...) Luckily Kate has blogged about it with some lovely photos - please, do hop over and take a look
I know you are all dying to now what I received from Secret Santa....
Check out this gorgeous little bundle of loveliness from Laura at Made Peachy!
Not just one pressie but four! A lovely handmade felt stocking with huge jingle bells in my favourite festive colours, a bar of handmade soap (that smells yummy) and a candy cane to nibble on. Laura had obviously done her research and knew how much I loved all things kitty and made me a covered notebook too! I adore the kitschy little kitty on the front. The back of the cover shows the back view of the kitty - sooooo cute :-)
There was a lovely little notecard enclosed too (Laura, if you read this - where did you get that notecard from? It is just beautiful!) sealed with wax which cracked delightfully when I opened it. I am definitely getting me some sealing wax and a stamp in 2014 - it is so much more satisfying than just ripping open a normal gummed envelope!
Thank you so much Laura - I am blown away by your thoughtful gift!
And thank you Emma for having the idea and organising us all - you are awesome!!
I hope you all had a fab Christmas and Santa brought you all lovely gifts too!
Merry Christmas & Happy New Year x
Tuesday, October 29, 2013
#WIPsLinky No.4 - Christmas is a coming...
Did you know there are only 8 weekends left til Christmas?
That may be enough to strike fear into the heart of many a crafter - especially if, like me, you plan on giving everyone at least ONE Christmas pressie produced by your own fair hands!!
So most of my works-in-progress this month will be Christmas pressies - which means I can't show you them here as some of the recipients read my blog! (however they don't use Twitter so I may be able to share some on there - search the #WIPsLinky hashtag if you are feeling nosey!)
Now there is a definite nip in the air I would love to get back to working on my patchwork cable blanket. I have only managed one more panel since I mentioned it last and I suspect very little further progress will be made this side of Christmas! Ah never mind - plenty of time to cosy up with blanket making in the New Year . . .
Last month's main work in progress was the fab retro dance dress I was making for the 60's Dance and Joe Meek celebration at Newent which was last weekend.

You'll be pleased to know I managed to finish the dress - sewing on the last button just hours before I wore it and danced the night away in it! I was a little nervous that the poppers holding it all together would unpop in the middle of the Twist but it all held together!
Making my own dress was immensely satisfying - I will definitely be doing it again! Now I just need to hunt out some cool patterns...
What are you up to this month? Have you started Christmas crafting yet?
Blog your current works-in-progress and link up so we can all see what you are up to - there's nothing like going public if you want to avoid projects falling by the wayside unfinished... (trust me!)
As usual I will add all your projects to my #WIPsLinky Pinterest board too - it's becoming a little #WIP treasure trove!!
That may be enough to strike fear into the heart of many a crafter - especially if, like me, you plan on giving everyone at least ONE Christmas pressie produced by your own fair hands!!
So most of my works-in-progress this month will be Christmas pressies - which means I can't show you them here as some of the recipients read my blog! (however they don't use Twitter so I may be able to share some on there - search the #WIPsLinky hashtag if you are feeling nosey!)
Now there is a definite nip in the air I would love to get back to working on my patchwork cable blanket. I have only managed one more panel since I mentioned it last and I suspect very little further progress will be made this side of Christmas! Ah never mind - plenty of time to cosy up with blanket making in the New Year . . .
Last month's main work in progress was the fab retro dance dress I was making for the 60's Dance and Joe Meek celebration at Newent which was last weekend.

You'll be pleased to know I managed to finish the dress - sewing on the last button just hours before I wore it and danced the night away in it! I was a little nervous that the poppers holding it all together would unpop in the middle of the Twist but it all held together!
 |
| the dress was made like an apron - over the head then the back wrapped round the front |
 | |
| not the best picture - but you get the idea... |
Making my own dress was immensely satisfying - I will definitely be doing it again! Now I just need to hunt out some cool patterns...
What are you up to this month? Have you started Christmas crafting yet?
Blog your current works-in-progress and link up so we can all see what you are up to - there's nothing like going public if you want to avoid projects falling by the wayside unfinished... (trust me!)
As usual I will add all your projects to my #WIPsLinky Pinterest board too - it's becoming a little #WIP treasure trove!!
Happy crafting!
Saturday, November 17, 2012
Back to Business...

Now the Little Man is properly settled into school and I have caught up on all the paperwork that didn't get done over the summer, I am finally getting back to my sewing and giving Forest Flower Designs the attention it has been craving all year. Yes I let things slide a little but now I am back!!
After an absence of several months, I have re-opened my Folksy shop. I must admit I am enjoying the 'new' Folksy very much. It looks sleeker and more contemporary and from a sellers point of view, much easier to use. I really love that they have fully embraced the Pinterest phenomenon too! Just create a board of Folksy pins (with Folksy in the title so they can find it) and if you're lucky your selection may make the home page! My '50 Folksy Shades of Grey' pin board was featured last week and I had a lovely message of thanks from one of the makers on my board whose featured item sold the same day!
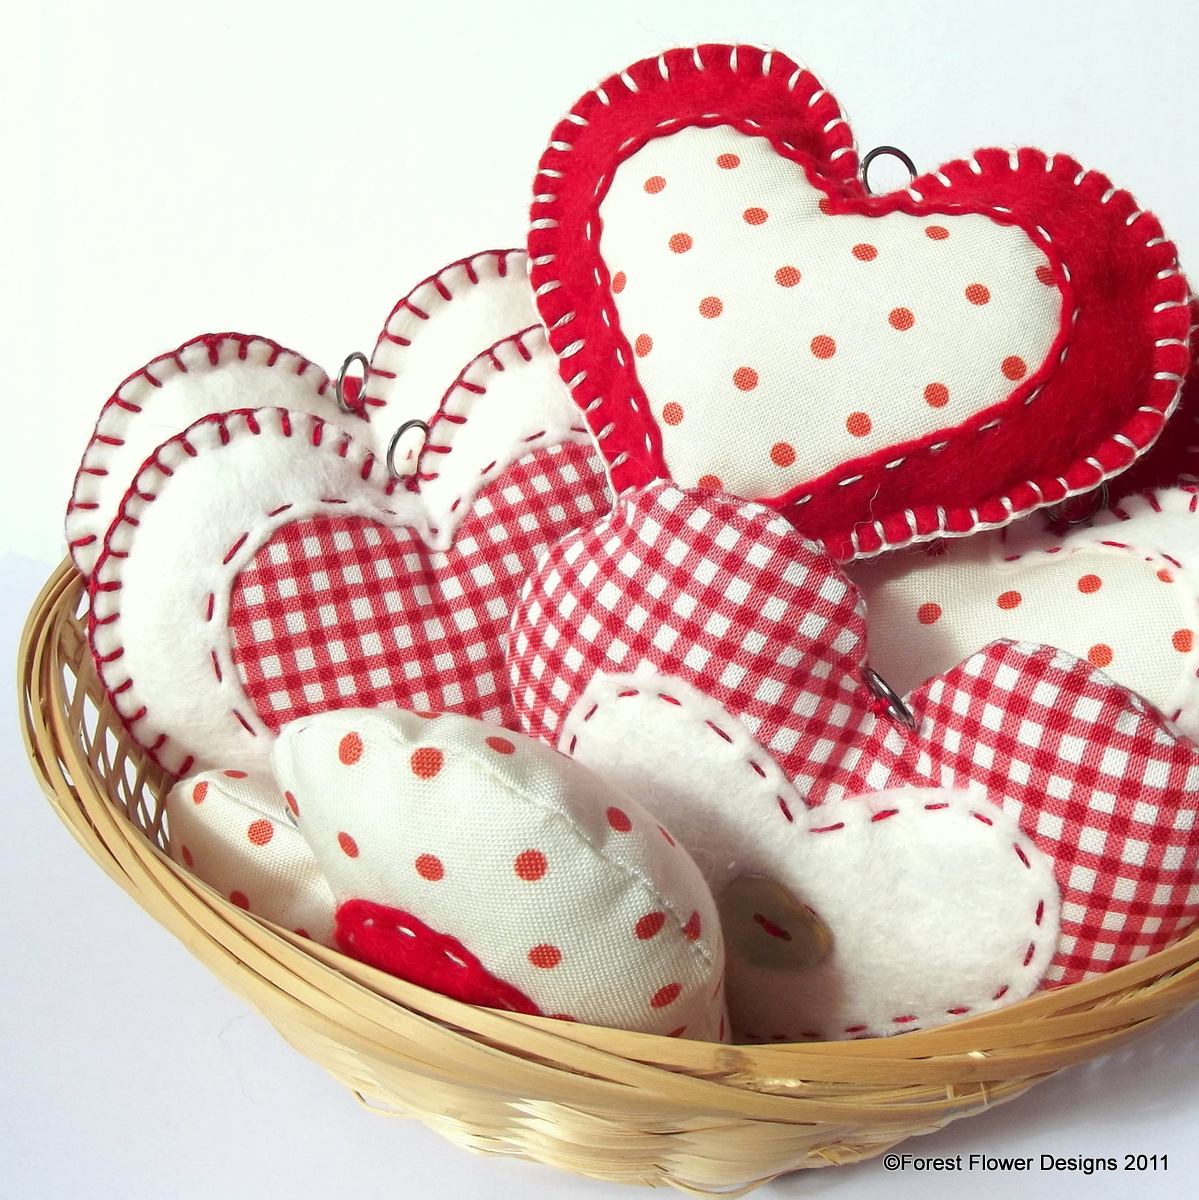
I have added some of my Rustic Country collection hearts and birds this week - these were best sellers last year and are just perfect for those of you looking to create a Nordic style red and white Christmas decorating theme...
 |
| Rustic Country Collection felt birds |

My favourite red felt and gingham heart was featured on the Folksy home page this week thanks to Melissa's Ceramics pinboard.
Brand new items listed are these two fab drawstring pouches - fully lined and featuring metal eyelets for the drawstring.


Skull and crossbones pouch - fill with gold doubloons for your little pirate's stocking. It can be used to carry treasure around long after the chocolate coins have been snaffled!!


Pretty fairy princess pouch - adorned with fairies, butterflies, glittery crowns and cute castles and lined with the loveliest patchwork print fabric in candy colours, your little princess will just love finding this in her stocking. Fill it with hair accessories or jewellery as well as chocolate!
I have two more designs in production (hope to list next week). One is a mermaid theme - gorgeous mermaids swimming against a back drop of turquoise blue with a fab multi coloured stylised fish scale print lining. The other is a farmyard design featuring ducks, cows, pigs, chickens and tractors! With a colourful spotty lining and a cow print drawstring channel this one is great for younger children (or wannabe farmers of any age!)
Mini bunting banners to match are also in production and I hope to list those very soon too!
I have some other products I am very excited about too (if you like my Forest Flower Designs facebook page you may have already spotted them) I will share those with you here when I am ready!
I am also offering free post and packing throughout November to all my UK Folksy customers so there's never been a better excuse to treat yourself!
Tuesday, November 06, 2012
Woven Ribbon Lavender Pillow Tutorial
 Now we have Bonfire Night out of the way, I guess it's time mention the 'C' word...
Let's not get too festive and sparkly just yet (no, really, plenty of time for that NEXT month!) but those of you who aspire to a Handmade Christmas really should start thinking pressies if you haven't already. I have about 5 half completed pressie projects on the go at the mo. I'm not panicking. Yet.
I've raided my Jane Means ribbon stash again to come up with this stylish gift idea - and it's a great way to use any lavender you may have dried in the summer!
You will need a couple of meters of your chosen ribbon - I have used these lovely polka dot grosgrain ribbons in co-ordinating turquoise and chocolate brown - a couple of small pieces of fabric and some dried lavender.
First decide on the size of your pillow and cut out two pieces of cotton fabric approx 2cm larger than you want the finished size to be. Mine measures 10cm x 8cm finished so my base fabric pieces were approx 12cm x 10cm.
If your pillow is oblong, like mine, you will need to cut shorter lengths in one colour to fit the width and longer lengths in the contrast colour. I used 7 x 10cm lengths of the turquoise ribbon and 6 x 12cm lengths of the chocolate brown ribbon.
Now, using one of the fabric pieces as your base begin weaving your ribbon strips. You may find it easier to pin the ribbons to the fabric or tack them in place around the edges as you go

Try and keep the ribbons matched up edge-to-edge for a neat finish. It's a bit fiddly but don't worry about it too much as you have the base fabric underneath to stop and lavender escaping the finished pillow!
When all the ribbon strips are in place and secure take you other piece of fabric and lay it, face down, on top of the ribbon panel. Pin, tack and stitch all the way around, leaving an opening in the middle of one long edge to turn the pillow the right way round.
Turn, stuff with dried lavender, stitch up the gap and you're done!!

These pillows are so easy to adapt too - use wider ribbons to make larger pillows. Use up your ribbon scraps and make a lovely colourful boho inspired pillow. Use all one colour for an elegent textured look. You'll find loads of gorgeous ribbons on Jane Means website if you need any further inspiration!
Monday, November 28, 2011
#HandmadeChristmas - An Apology
Life has a way of taking over, have you noticed that?
Despite all my plans and ideas for a whole series of Handmade Christmas posts, we are less than four weeks away from the BIG DAY and... well... time is running out.
It's not that the ideas went away more a case of being pushed to one side while I was forced to concentrate on more important stuff like working out how the hell we are going to keep both shops open now we are a staff member down and all our friends/family/nice people who help out are either ill or have other commitments. It doesn't help that while much of the retail sector is building up for the Christmas rush this is traditionally the time of year our business tends to wind down a little as all the fair weather bikers pack up their gear for the winter...
I have been ill for best part of three weeks too, and last week Little Man was struck down and spent 3 days in a semi-zombie state on the sofa, temperature going up and down like a yo-yo and with barely enough energy to keep his eyes open.
Evidently he was not considered serious enough for a home-visit from the doctor so I had to bundle him up, fish out the long unused pushchair and take him down to surgery in the cold and dark only to be told there was very little to be done and to continue giving him Calpol every 4 hours.
A week of sleepless nights compounded by worry about the business, our finances and family stuff has left me feeling drained and exhausted.
So this post is mainly an apology that the promises of Handmade Christmas posts I had planned will not be happening now - I will not be making my own mincemeat because we simply cannot afford the ingredients (although I still hope to have a go at fudge...)
I have been asked by MENCAP to create a tutorial for their Christmas Make with Me campaign which I am more than happy to do but the tutorials I had hoped to share with you here will have to wait until next year. I will, however be posting a list of fab tutorials that I have found around the inter web for you to have a go at and I still hope to highlight some great handmade decorations available to buy for those of you who have neither the time nor the inclination to create your own.
As life continues to do it's damnedest to butt in and spoil my plans I will be taking a little step back from the blog. I am determined that no matter how stressful and depressing our situation may seem at the moment, we will have a wonderful, Handmade Christmas to remember.
I hope you all do too! xx
Despite all my plans and ideas for a whole series of Handmade Christmas posts, we are less than four weeks away from the BIG DAY and... well... time is running out.
It's not that the ideas went away more a case of being pushed to one side while I was forced to concentrate on more important stuff like working out how the hell we are going to keep both shops open now we are a staff member down and all our friends/family/nice people who help out are either ill or have other commitments. It doesn't help that while much of the retail sector is building up for the Christmas rush this is traditionally the time of year our business tends to wind down a little as all the fair weather bikers pack up their gear for the winter...
I have been ill for best part of three weeks too, and last week Little Man was struck down and spent 3 days in a semi-zombie state on the sofa, temperature going up and down like a yo-yo and with barely enough energy to keep his eyes open.
Evidently he was not considered serious enough for a home-visit from the doctor so I had to bundle him up, fish out the long unused pushchair and take him down to surgery in the cold and dark only to be told there was very little to be done and to continue giving him Calpol every 4 hours.
A week of sleepless nights compounded by worry about the business, our finances and family stuff has left me feeling drained and exhausted.
So this post is mainly an apology that the promises of Handmade Christmas posts I had planned will not be happening now - I will not be making my own mincemeat because we simply cannot afford the ingredients (although I still hope to have a go at fudge...)
I have been asked by MENCAP to create a tutorial for their Christmas Make with Me campaign which I am more than happy to do but the tutorials I had hoped to share with you here will have to wait until next year. I will, however be posting a list of fab tutorials that I have found around the inter web for you to have a go at and I still hope to highlight some great handmade decorations available to buy for those of you who have neither the time nor the inclination to create your own.
As life continues to do it's damnedest to butt in and spoil my plans I will be taking a little step back from the blog. I am determined that no matter how stressful and depressing our situation may seem at the moment, we will have a wonderful, Handmade Christmas to remember.
I hope you all do too! xx
Friday, November 25, 2011
Black Friday - sales start here...
Today is Black Friday - the day when, in the States at least, the festive shopping frenzy begins in earnest with many stores opening their doors as early as 4am with some juicy discounts in a bid to capture the gift market right from the start. It would seem the trend is beginning to take hold here too with many of our big names offering discounts for the day (which will probably stretch into the week and then, before we know it the Boxing Day Sales...)
The day is called Black Friday because the boost to income allegedly sees retailers begin to turn a profit, or 'go into the black' but the origins of the term can be traced back to Philadelphia where it was used to describe the unusually heavy traffic on the day after Thanksgiving. This year some US stores have opened even earlier than usual sparking a backlash of 'anti-Back Friday' sentiment as employees are forced to give up several hours of sleep or family time at Thanksgiving...
Well, I don't have any employees (unless you count the Little Man helping me find the lost sticky tape when parcel wrapping....) so the only person getting up early this morning was me (completely involuntarily, I might add) and the beauty of a virtual shop is that is can be open 24 hours a day with no-one to staff it!
So here is my contribution to the Black Friday frenzy...
A very special, ONE DAY ONLY order code that gets you 25% off everything on my website! Just visit my little corner of the interweb, browse handmade goodies to your hearts content, then enter BLACKFRIDAY at the checkout and the discount is yours! International shipping is now available too - so you can bag yourself some HandmadeChristmas charm wherever you are, without having to fight your way through crowds of bargain hunters.

The day is called Black Friday because the boost to income allegedly sees retailers begin to turn a profit, or 'go into the black' but the origins of the term can be traced back to Philadelphia where it was used to describe the unusually heavy traffic on the day after Thanksgiving. This year some US stores have opened even earlier than usual sparking a backlash of 'anti-Back Friday' sentiment as employees are forced to give up several hours of sleep or family time at Thanksgiving...
Well, I don't have any employees (unless you count the Little Man helping me find the lost sticky tape when parcel wrapping....) so the only person getting up early this morning was me (completely involuntarily, I might add) and the beauty of a virtual shop is that is can be open 24 hours a day with no-one to staff it!
So here is my contribution to the Black Friday frenzy...
A very special, ONE DAY ONLY order code that gets you 25% off everything on my website! Just visit my little corner of the interweb, browse handmade goodies to your hearts content, then enter BLACKFRIDAY at the checkout and the discount is yours! International shipping is now available too - so you can bag yourself some HandmadeChristmas charm wherever you are, without having to fight your way through crowds of bargain hunters.
Happy Shopping peeps xx
Tuesday, November 15, 2011
#HandmadeChristmas - Vivi Gade Paper Baubles
So, how many of you have tried the Paper Stars yet? Want to have a go at some lovely paper baubles to match? Of course you do!!
Vivi Gade Paper Baubles
 Amongst the little bundle of goodies Creativity Direct sent me was a pack of pre-cut strips to make these fabulous decorations.
You will need a set of Vivi Gade die-cut paper strips and possibly a fittings kit (although if you are a jewellery maker too it's possible you will already have the beads, crimps and wire in your stash). You will also need a pair of chain nose pliers and side cutters for the wire.
First sort through the paper strips to get the colour/pattern combos you want - I did some single pattern ones and some mixing two patterns. You may find you have some odd ones left over. Use these to make your first bauble - just to get the technique right.
I used a large wool sewing needle to enlarge the pre-punched holes either end of the paper strips as they were little more than pin pricks before assembling the baubles following the tutorial
 It states at the end of the tutorial that 'unfolding' the baubles takes a little practice. I would certainly agree with this - just pay attention to the shaped bits at the top and bottom and make sure they overlap as they should and they work fine. Also make sure you pull the wire tight before squeezing the crimps and don't leave the wire between the top and bottom (ie the inside of the bauble) too long or your bauble won't keep it's shape.
The theory is quite simple but these are actually quite fiddly to put together. A little experience with beading and using pliers (I used to make jewellery) definitely came in handy and, unlike the stars, which are just folded paper, a couple of extra tools are required to put these together.
But they are definitely worth it! The finished baubles look absolutely stunning and will certainly add an unusual touch to my tree this year.
The best thing about them is I will be able to close them up and store them away for next year too!
Creativity Direct provided the materials for me to have a go at this project but all words and pictures are my own
Vivi Gade Paper Baubles
 Amongst the little bundle of goodies Creativity Direct sent me was a pack of pre-cut strips to make these fabulous decorations.
You will need a set of Vivi Gade die-cut paper strips and possibly a fittings kit (although if you are a jewellery maker too it's possible you will already have the beads, crimps and wire in your stash). You will also need a pair of chain nose pliers and side cutters for the wire.
First sort through the paper strips to get the colour/pattern combos you want - I did some single pattern ones and some mixing two patterns. You may find you have some odd ones left over. Use these to make your first bauble - just to get the technique right.
I used a large wool sewing needle to enlarge the pre-punched holes either end of the paper strips as they were little more than pin pricks before assembling the baubles following the tutorial
 It states at the end of the tutorial that 'unfolding' the baubles takes a little practice. I would certainly agree with this - just pay attention to the shaped bits at the top and bottom and make sure they overlap as they should and they work fine. Also make sure you pull the wire tight before squeezing the crimps and don't leave the wire between the top and bottom (ie the inside of the bauble) too long or your bauble won't keep it's shape.
The theory is quite simple but these are actually quite fiddly to put together. A little experience with beading and using pliers (I used to make jewellery) definitely came in handy and, unlike the stars, which are just folded paper, a couple of extra tools are required to put these together.
But they are definitely worth it! The finished baubles look absolutely stunning and will certainly add an unusual touch to my tree this year.
The best thing about them is I will be able to close them up and store them away for next year too!
Creativity Direct provided the materials for me to have a go at this project but all words and pictures are my own
Thursday, November 03, 2011
#HandmadeChristmas - Paper Stars
You know how much I love Scandinavian interiors. I love the clean lines, the fresh colours, the light, the innovative use of space - it is something for me to aspire to (although I really need to de-clutter...). I am particularly inspired by Scandinavian folk art so when I discovered creativitydirect.co.uk earlier this year I was in crafting heaven!!
Their brilliant website (and accompanying HUGE paper catalogue) is just packed to the gills with gorgeous papers, stickers, trimmings, fabrics, ribbons, beads, buttons, paints and items to decorate that, if you are a bit of a 'butterfly crafter' (ie: you flit from craft to craft) you will be hard pressed to know where to start!!
Very helpfully Creativity Direct have included a big 'IDEAS' section on their website giving detailed tutorials on all manner of crafty makes from papercrafts to art, from sewing and knitting to jewellery. They even have 'seasonal crafts' sections covering Christmas and Easter. Each tutorial consists of clear photographs showing each stage of making, downloadable templates if needed and useful ingredients lists with links to the items on their website, making shopping for your crafty bits a lot easier.
Creativity Direct sent me a few of their gorgeous items so I could have a go at a couple of their lovely Christmas tutorials.
First up...
 I received a pack of Vivi Gade paper strips from the gorgeous Copenhagen range - red and cream strips, polka dots and damask type patterns - right up my street.
The tutorial was very clear and easy to follow, although I did find getting the turn of paper for the 3D effect a bit tricky to start with!
It is very important that you set the four paper strips up correctly to begin with and make sure your folds all go in the right direction!
The first star took me about 15 mins to make but once I got the hang of it they took no time at all!!

Completed stars can be piled up in a bowl as they are or attach some cotton (just punch through one of the flat points with a sharp needle and thread the cotton through) and hang them on your tree or make a lovely star mobile.
If you leave one side flat and trim the paper off neatly they also make really special gift toppers - just attach to your parcel with some double sided tape or glue pads.
The Weaving Paper Strips come in several different colourways and pack sizes and are available from creativitydirect.co.uk . The pack I used costs £4.50 and contained enough strips to make 5 large stars and 8 small ones. I think they are gorgeous and I can't wait to adorn my tree with them in December!
In the next Handmade Christmas post I will be having a go at some unusual paper baubles...
Creativity Direct provided the materials for me to have a go at this project but words and pictures are all my own.
Their brilliant website (and accompanying HUGE paper catalogue) is just packed to the gills with gorgeous papers, stickers, trimmings, fabrics, ribbons, beads, buttons, paints and items to decorate that, if you are a bit of a 'butterfly crafter' (ie: you flit from craft to craft) you will be hard pressed to know where to start!!
Very helpfully Creativity Direct have included a big 'IDEAS' section on their website giving detailed tutorials on all manner of crafty makes from papercrafts to art, from sewing and knitting to jewellery. They even have 'seasonal crafts' sections covering Christmas and Easter. Each tutorial consists of clear photographs showing each stage of making, downloadable templates if needed and useful ingredients lists with links to the items on their website, making shopping for your crafty bits a lot easier.
Creativity Direct sent me a few of their gorgeous items so I could have a go at a couple of their lovely Christmas tutorials.
First up...
Folded Paper Stars
 I received a pack of Vivi Gade paper strips from the gorgeous Copenhagen range - red and cream strips, polka dots and damask type patterns - right up my street.
 The tutorial was very clear and easy to follow, although I did find getting the turn of paper for the 3D effect a bit tricky to start with!
It is very important that you set the four paper strips up correctly to begin with and make sure your folds all go in the right direction!
The first star took me about 15 mins to make but once I got the hang of it they took no time at all!!

Completed stars can be piled up in a bowl as they are or attach some cotton (just punch through one of the flat points with a sharp needle and thread the cotton through) and hang them on your tree or make a lovely star mobile.
If you leave one side flat and trim the paper off neatly they also make really special gift toppers - just attach to your parcel with some double sided tape or glue pads.
The Weaving Paper Strips come in several different colourways and pack sizes and are available from creativitydirect.co.uk . The pack I used costs £4.50 and contained enough strips to make 5 large stars and 8 small ones. I think they are gorgeous and I can't wait to adorn my tree with them in December!
In the next Handmade Christmas post I will be having a go at some unusual paper baubles...
Creativity Direct provided the materials for me to have a go at this project but words and pictures are all my own.
Wednesday, November 02, 2011
#HandmadeChristmas - what's it all about?
Now we have Halloween out of the way and we are properly into November I guess I can start talking about Christmas without getting too many dirty looks and dark mutterings in my general direction...
If, like me, you are getting fed up with the whole crazy commercialism that surrounds the festive season you may want to join the ever growing trend that recognises the unique value of handmade gifts, decorations and food.
These days it is possible to do your entire Christmas shop from ONE supermarket - from the food to the drink; presents for everyone from baby to Granny. Cards, trees, decorations and even the outfit you are going to wear for the Christmas party.
But why would you want to do that? Really?
Now I'm not suggesting for one second you fore go the supermarket completely (although I would say that doing your food shop online two weeks before and booking a home delivery to arrive couple of days before Christmas is definitely preferable to fighting over the last frozen turkey with 15 other desperate shoppers...)* but certainly consider creating a few homemade touches to your celebrations to create a really memorable Christmas.
From gorgeous paper star and bauble decorations to homemade mince pies made with your own mincemeat, to highlighting some great British designer/makers for fabulous gifts you can pretty much guarantee you won't find on the supermarket shelves.
In my first post, tomorrow, I will be showing you how to make some gorgeous star decorations just by folding strips of paper.
Later on I will be trying some homemade sweeties, which make a really good present, and the above mentioned mince pies. I hope to show you some gift ideas to make yourself and highlight some great tutorials across the web, plus some picks from the many talented online sellers from sites like Folksy, Etsy, Gift Wrapped and Gorgeous, Not on the High Street and the newly set up SHHIMUK promoting independent sellers who, like me, are going-it-alone and running their own online emporium!
Last year I set up the successful Handmade Christmas page on Facebook and encouraged designer/makers to use the #handmadechristmas hashtag on Twitter when advertising their wares. All the relevant blog post will be posted on both Facebook and Twitter.
If you want make sure you don't miss a thing why not follow this blog with GFC or subscribe by clicking on the 'posts' button at the top of the right hand column?
*thats a whole other blog post.... I might write it one day!
If, like me, you are getting fed up with the whole crazy commercialism that surrounds the festive season you may want to join the ever growing trend that recognises the unique value of handmade gifts, decorations and food.
These days it is possible to do your entire Christmas shop from ONE supermarket - from the food to the drink; presents for everyone from baby to Granny. Cards, trees, decorations and even the outfit you are going to wear for the Christmas party.
But why would you want to do that? Really?
Now I'm not suggesting for one second you fore go the supermarket completely (although I would say that doing your food shop online two weeks before and booking a home delivery to arrive couple of days before Christmas is definitely preferable to fighting over the last frozen turkey with 15 other desperate shoppers...)* but certainly consider creating a few homemade touches to your celebrations to create a really memorable Christmas.
From gorgeous paper star and bauble decorations to homemade mince pies made with your own mincemeat, to highlighting some great British designer/makers for fabulous gifts you can pretty much guarantee you won't find on the supermarket shelves.
In my first post, tomorrow, I will be showing you how to make some gorgeous star decorations just by folding strips of paper.
Later on I will be trying some homemade sweeties, which make a really good present, and the above mentioned mince pies. I hope to show you some gift ideas to make yourself and highlight some great tutorials across the web, plus some picks from the many talented online sellers from sites like Folksy, Etsy, Gift Wrapped and Gorgeous, Not on the High Street and the newly set up SHHIMUK promoting independent sellers who, like me, are going-it-alone and running their own online emporium!
Last year I set up the successful Handmade Christmas page on Facebook and encouraged designer/makers to use the #handmadechristmas hashtag on Twitter when advertising their wares. All the relevant blog post will be posted on both Facebook and Twitter.
If you want make sure you don't miss a thing why not follow this blog with GFC or subscribe by clicking on the 'posts' button at the top of the right hand column?
*thats a whole other blog post.... I might write it one day!
Going Live...
Well after a month of planning, typing, photographing, uploading, tweaking, more tweaking, testing and fine tuning my brand new website has finally GONE LIVE!!!
Please go and have a nose about and tell me what you think!
I had my first sale within 15 mins of launching but I would love some more. As an added incentive all you lovely blog readers can add the code BLOG20 at the checkout for a 20% discount on your order total (excluding P&P)*
Currently my my complete Rustic Country Collection is available - including scrummy, festive Christmas Spice scented options - and gorgeous felt and gingham Christmas Star decorations. I am hoping to add more christmassy things very soon - stockings, garlands, bunting, decorations. Just perfect for a Handmade Christmas!
I am really please with how it has turned out and how easy it was to do. The create.net package as very user friendly and gives you a professional looking shop in no time at all, and you even get a month free trial to build your website and assess how well you get on with the package before you have to start paying. Can't ask for more than that!!
*discount code valid until 14th November 2011
Tuesday, October 11, 2011
Forest Flower Designs gets featured...

In other news I was offered a trial run with online boutique Gift Wrapped and Gorgeous, including their full pr package which included uploading of hi-res images of my products onto Press Loft. This is where all the journalists go to source product images for magazines - monthly membership costs something in the region of £200 so to have someone do this on my behalf, for free (for a limited period) has been tremendously helpful in developing Forest Flower Designs, as you can imagine. Especially when I received an email a few weeks back to say that one of my images had been downloaded by a journalist from Living Edge!
 To say I was a bit excited is possibly an understatement
Then, last week I got another email with a pdf attached of a page full of red and white loveliness!!!
Honestly I am so proud to see something I have made in print, alongside all those other gorgeous things - every one of which I would quite happily give a home to by the way!
So many thanks to Alison and Amanda at GWAG for giving me this opportunity and to Leanne who does all the pr stuff for keeping me in the loop!
I am currently building a new website using create.net which I am really enjoying working on. It is much more geared towards the creating of a great online shopping experience for my customers and much easier to use than the MrSite package I currently have. Hoping to re-launch by the end of October and I will be posting some exclusive 'blog readers special offers' so stay tuned!!
Wednesday, September 07, 2011
Forest Flower Designs - I'm dreaming of a (Red &) White Christmas...

I am very excited about my new Forest Flower Designs collection for Autumn 2011!
Inspired by my love of Scandinavian Chic, Rustic French country elegance and English Shabby Chic, along with my desire to create a stylish, co-ordinated red and white Christmas decorating theme that wasn't overtly christmassy and so could be enjoyed all year round.
It all began with these fabrics...

I spotted the cute polka dot and the gorgeous retro floral print at my local quilting shop The Patchwork Basket in Newent...

I am so totally in love with this fabric - from last year's 'Lumiere de Noel' collection by French General for Moda. I just knew I HAD to do something with it. Unfortunately for me it is, as I said, from LAST year's collection and, as I had the last FQ the shop had I then had to track down further supplies. There seemed to be plenty of it still available in the States but for UK sellers it was like gold dust. Finally found some at Thread Bear , thanks to the power of Twitter!! (or more correctly, the helpfulness of my lovely twitter friends!)
So this is what I have done with them

Six gorgeous felt birdies with patterned wings...

...six hand-stitched felt hearts with patterned fabric inserts...

...and these cute fabric hearts with felt panels and heart shaped shell buttons.
I absolutely love this collection I have named 'Rustic Country', and it seems other people do too! It has already been picked up by a gallery in Oxfordshire - The Tube Gallery - who want to feature the hearts and birds as part of their 'Wonderland' exhibition running from October into the New Year, alongside loads of really talented artists and designers whose work they consider 'an eclectic mix of all that is wonderful and covetable'. I am so proud to be part of that! If you live in (or are visiting) the Forest of Dean area, the full range will be stocked by Solid Objects Gift Store in Newent and the award winning Forest Bookshop will be incorporating them into their Christmas window display and selling a selection.
I have added these designs to my Folksy shop and I am in the processes of uploading them to my Gift Wrapped & Gorgeous boutique. (There will be some online exclusives being added there shortly too!)
All of these decorations would look just gorgeous anywhere in your home but I reckon they would make an amazing display on your Christmas tree for a relaxed and stylish red and white 'Handmade Christmas' decorating theme. Coming up in the next few weeks I hope to add some more new designs 'Rustic Country Christmas Collection' will include bunting (including one special design/idea I can wait to unveil), mini stockings, full size personalised stockings and garlands.
Following my popular Handmade Christmas Giveaway last year I have something bigger and better in planning for this year. Stay tuned!
Saturday, December 18, 2010
My Handmade Christmas (pt 4) A card for life, not just for Christmas...
This year we (that is I, obviously, as it's generally me who buys, writes and distributes!) decided that we were going to keep cards to a minimum - immediate family, close friends and those good friends who live far away and whom we are not likely, but would dearly love to see over the festive period.
In keeping with the whole Handmade Christmas theme I decided it would be a really nice idea to make cards rather than buy them and way back in September I spotted a Cross Stitch magazine with a free 'make your own luxury cards' kit. The cards were cute, contemporary designs in bright colours and there were enough polka dots to keep even me happy. Perfect!!
Now I, like many crafters, like to dabble, and I have done counted cross stitch in the past. In fact I'm sure there are two or three unfinished 'projects' floating around the place that I will get around to completing one day. The prospect of half a dozen simple motifs didn't phase me at all. 'Won't take long,' thinks I...

But cross stitch is a lot more time consuming than I remembered and each one of those little motifs actually took a lot longer than I thought they would...

...and several evenings were swallowed up putting needle and thread to aida...

Once all the motifs were stitched I ironed on some interfacing to the back of the aida and cut out each motif before combining them with other bits and bobs - sequins, felt shapes, buttons - to make up the cards.

I must confess I am quite chuffed with the results and I know they will be appreciated by those who receive them. I hope they will be kept and added to the decoration stash to be brought out year after year.
Despite my best intentions I really didn't have time to make everybody a card so I did the next best thing and sourced some really special cards in for everyone else...

These cards are designed by the lovely Becky Peabody, a Somerset based artist who creates fabulous collages from torn paper and, like me, has a passion for polka dots! Her gorgeous collection of cards, postcards, notebooks, pictures and more are available from her website dotsandspots.co.uk . Go and have a look - you won't be disappointed :)
So all that's left to do now is finish off the presents and wrapping and get stuck into some Christmas baking...
Wednesday, December 15, 2010
My Handmade Christmas (pt 3) Dried Orange Garlands
What is it about oranges that so sums up Christmas? They are said to represent the gift of Gold in the Nativity story and in the days before electronic gadgets and must-have toys they were an essential, and much anticipated stocking gift. The glorious orangey scent blends so well with spices - cinnamon, cloves and ginger to create a quintessential Christmas fragrance that fills my home thanks to a couple of well placed essential oil burners that I keep topped up over the festive period.
Piles of mandarins and clementines in their little red net bags fill the fresh fruit section of the supermarket at this time of year and a fair few of them have found their way into my shopping basket and home, where they are currently residing in a basket with some unshelled walnuts looking oh-so-christmassy.
This year I decided to have a go at making some orange decorations and, rather than buy ready dried orange slices, I thought I'd do it from scratch and dry some myself. After all, how hard could it be?
So first of all you need a couple of nice firm oranges. Not the above mentioned clementines et al but the big ones you might juice for breakfast if you were feeling a bit decadent...

Cut them into fairly thick slices - about 5-10mm

and lay them all out on a baking tray.
Pop them in the oven on it's lowest setting for a couple of hours until they are completely dried out.
Then transfer them onto a wire rack to cool...

et voila! Dried orange slices ready to be made into pretty, festive decorations!
Well that's the theory anyway...
As you can see some of mine turned out a little too crispy round the edges and not quite as 'pretty' as the commercially dried slices. But I did them myself and that's what counts :)

And strung together on some red gingham ribbon I think they pass muster!

The rest look very pretty displayed in this little glass jar and, although they may not look perfect, they smell divine.
Which is, after all, the whole point!
Now I have some presents to finish off as there are only 10 sleeps till the big day :)
Tuesday, December 14, 2010
My Handmade Christmas (pt 2) Deck the Halls...
If there is one thing I have learned since having Riley it's that my time is no longer my own. In the old days the decorations would come down from the loft and we would spend a lazy weekend tinselling, hanging lights, dressing the tree and generally making the place look as festive as possible. Even last year Riley was small enough to nap for a couple of hours during the day so I could 'get on with it'. No more...
Now it has to be done in stages to accomodate a small boy's attention span and so as not to stretch mummy's patience too thin...
So the tree went up (see My Handmade Christmas (pt 1) ) and that was about as much as we could do in one day. Next job was to finish dressing the 'Christmas Room' (aka the conservatory).

The dresser has been...er...dressed...

This cute little Christmas clock I picked up from a charity shop a couple of years back. I love the little Santa pendulum, plus it plays Christmas tunes on the hour :)

Pride of place goes to this little Santa made by my other half when he was at primary school which makes it over 20 years old!(not going to tell you HOW much over - he might sulk)
Who says family heirlooms have to be valuable pieces? It might just be some scraps of felt and a toilet roll but it's absolutely priceless.
I bought a lovely green wreath from the last Christmas Fair I was selling at. It is packed full of holly, evergreens and berries and I have added some of our glittery pine cones and dried orange slices (more on those in part 3!).

Even the kitchen has been properly pimped...

I added some cute mini glass baubles filled with 'angel hair' to my red gingham heart garland and some fab 'crystal' LED lights and tinsel to the stainless steel pan shelf...

More baubles in a glass vase on the window sill.
And finally, hanging on the tree ready to be filled with treats for him to find on Christmas morning,
is the stocking Riley decorated with 'In the Night Garden' stickers.

His own little contribution to our Handmade Christmas.
Monday, December 06, 2010
My Handmade Christmas (pt 1) The Tree!!
So I have been a naughty blogger... I have completey failed to post anything since November 1st but I do have an excuse. To be fair I have a number of them but among the more relevent ones are 'I have been really busy making things and attending craft fairs and Christmas Shopping events (as a seller and shopper both)', 'I have a lot of paperwork to catch up on...', 'I'm soooo tired...' and 'I've been gearing up for my own handmade Christmas...'
Actually it's the first and the last one that have taken up the most of my time. My plush scented decorations have sold really well and kept me busy since the end of August - there are only a few left now (I don't want to think how many of them I actually made...) and they have ended up on my own tree :) The Christmas Fayre Frenzy has more or less finished and most of my Christmas stock has been sold (for the few remaining things check out my Folky shop and if you are on Twitter search #handmadechristmas for loads of other fabulous present and decoration ideas.)
And now on to my own Handmade Christmas...
Those of you who have been reading my blog for a while will know that this has been my project for the second part of 2010 - promoting the idea of a Handmade Christmas to the world and encouraging you all to ditch some of the more commercial trappings of the festive season in favour of a more homespun approach. So have I been doing my bit? You betcha!!!
So first up is the tree...
Now I will confess that not all the decorations are handmade - I have been collecting baubles, stars, garlands, lights and tinsel for some years now and it would be a shame to waste them...

I love my red mirror baubles...

...and my glittery snowflakes. (The snowman was bought for Riley's 1st Christmas)

And I can't get enough of fairy lights!
But nestled in amongst the regular decorations are a few of my handmade scented ones, adding their festive fragrance to the room...


There are also a number of pine cones that I have collected with Riley over the past few months. Last week we had great fun painting them with glue and dipping them in silver glitter. I think you'll agree, the effect is lovely :)

and here's how it looks altogether...

So how many of you have your tree up now? I hope you had as much fun decorating it as we did!

Subscribe to:
Posts (Atom)
