Showing posts with label Jane Means. Show all posts

Thursday, November 13, 2014

Book Review - 'Giftwrapped' by Jane Means

Giftwrapped  by Jane Means
November 2014 Hardback £20
published by Jaqui Small 

The Christmas season is nearly upon us and the trend for beautifully wrapped gifts using unexpected embellishments and recycled materials has never been stronger.


In this fabulous book, Gift Wrap Guru Jane Means - gift wrapper to the rich and famous - celebrates her signature style and shares her secrets of a perfectly wrapped gift! 

Thursday, September 26, 2013

Craft Blog Club Challenge - Cover a notebook

A few weeks ago I spotted something new on Twitter on a Tuesday night.

#CraftBlogClub - hosted by the lovely Emma of Life is Peachy every Tuesday between 7 and 8pm - gives crafty bloggers a chance to chat about craft blogging, offer advice support and generally have a bit of a giggle. Emma tries to keep us focused on a theme each week (she also does a fantastic write up on her blog afterwards covering the main points talked about) and also sets us a monthly challenge. As there are so many different craft bloggers, each with their own niche, it's a great idea to get us all to offer up our own interpretation of a theme...

This month's challenge was to cover a notebook.


I chose to use a simple method I have used many times before but with a little twist, trying something new is what keeps things interesting right? I wasn't sure how well it would work but I am pretty pleased with the results!


You will need


Fabric - measurements depend on the size of book you wish to cover

one piece of main fabric
one piece of iron-on, medium weight interfacing (not essential but a good idea if you are using a light fabric)
one piece of contrast fabric

Ribbon for the spine trim
Ribbon for wrap around tie
matching button

Measuring up - your main fabric needs to be (4x the width of the front cover ) + the spine measurement  x the height of the book + 4cm
The contrast panel needs should be the same height as main panel and a bit less than half the width.

so for my A5 note book the main fabric measured (4 x 10.5cm) + 1cm  by (15cm + 4cm)
or 43cm x 19cm  and the contrast panel 20cm x 19cm

Cut the piece of iron on interfacing 1cm smaller all around - so in this case 41cm x 17cm - and place it centrally on the wrong side of your main fabric. Iron into place.


Press a 1cm seam along the 2 short edges and sew it in place (you'll see in the picture that I folded a hem on the long edge too - I'm not sure why, it's not necessary. I must have had a brain melt at that moment ;-) )

Fold the fabric in half length ways to find the centre point that will sit on the spine of the book.
Cut a length of wide ribbon - I used this lovely 20mm  Whitby Stripe by Jane Means - the height of the book + seam allowance (so, in this case, 19cm) and stitch it into position down the centre of your cover.


Now place your notebook, open, on the right side of the cover, making sure the spine is aligned with the ribbon. Fold each end over the notebook cover.


 Slide the notebook out of the cover and then take your contrast panel and pin it, face down, centrally so it covers the gap between each folder over end. (Again, no need to fold that little hem over like I have in the photograph - however you could fold over and hem the two shorter sides if your fabric is particularly easily frayed)


Stitch across the two long edges with a 1.5cm seam allowance. Trim the seams then turn through.


 Press the cover and slide the notebook into it's new jacket!

Adding ribbon loop and tie

Cut the ribbon approx 3 x the width of the book. I used a lovely cream and baby blue stripe ribbon from the Jane Means collection.

Seal the ends by holding it close (but not too close!) to a naked flame.The heat melts the fibres and stops the ribbon fraying.


Fold over one end to form a loop and stitch a button in place, sewing through the two layers of ribbon


Take a few stitches through the top layer of the book cover to secure (you might want to leave the book in the cover while you do this so you don't end up stitching right through the cover. Like I did...

Wrap the ribbon around the book and tuck the loose end through the loop.


Add a pen and pop it into your bag for stylish note taking on the go :-)


Happy Crafting!

Wednesday, July 03, 2013

Handmade Wedding bunting idea...

The other day I received a call for help from a friend of mine.

She has a family wedding coming up and the bride and groom, wanting a rustic, handmade feel for their big day, had requested that the guests each send a handmade bunting flag. Their idea is to stitch all the flags together to make a beautiful and totally unique addition to their wedding decorations.

What a wonderful idea!! Not only does this get everyone involved in their wedding preparations but at the end of it they have a gorgeous keepsake to remind them of their special day and all the people that came together to make it even more special.

But why did she need my help?

Well to use her own words "How does one sew?...(The whole family) know I can't even sew on a button!"

I hate to leave a friend in need and, lets be honest I don't need much encouragement when it comes to sharing crafty stuff!  I arranged to pop over and give her a hand. I wasn't going to make it for her, just give her a few pointers. Plus we get to drink lots of tea and have a natter too. Sounds like the perfect morning to me :-)

I took along a little bundle of materials and trimmings that fitted in with the 'rustic' theme. Fran wanted a natural look...

pretty crafty things....


Pretty natural fabrics, lovely cream and sage spotty ribbon from the Jane Means collection, some pretty pompom trim and a selection of vintage lace, buttons and embroidery threads.

We sat and talked ideas and Fran chose the base fabric she wanted. Then we set about appliqueing a gingham heart. Poor Fran's hands were shaking as she applied the first few stitches but she soon got the hang of it!

first tenative stitches


She added three rows of vintage lace trim, then we made a little bow with the spotty ribbon and attached it to the flag with a heart shaped wooden button.

buttons and bows

Now confident that, yes, she could actually sew on a button, Fran added a couple more and finished off the flag with some cute cream coloured pompom trim from Seamstar .  Once she was happy with her work she cut out the flag.

steady....

Fran was so pleased with her finished bunting...

proud crafter!

...and so she should be! The girl who said she lacked creativity and had absolutely no idea what to do and how to go about it, I think she did a pretty damn fine job, don't you?


The lucky couple have received the flag now and they love it too - it's going to look so pretty strung up with all the other handmade flags from their other guests!


It's such a fabulous idea and the perfect way to celebrate such a happy day :-)


ps - Fran agreed to have these pictures taken of her work in progress, just to prove to the rest of the family that actually, she can sew on a button. And more besides!


Tuesday, May 07, 2013

NEW :: Upcycled wool fabric needle books

You may remember a few weeks back I showed you a lovely wool fabric skirt I picked up from a charity shop £1 rail. Although I didn't know exactly what I was going to make with it I knew the lovely fabric would lend itself well to a variety of projects and the colour offers the perfect backdrop for many different colours

The first thing I made was a cute little needle book as a gift for my dad who loves to do cross stitch.


I used some lovely ribbon from my Jane Means stash for the button loop and decoration. If you watched the Great British Sewing Bee you might recognise the narrow grey stitched ribbon - it's the same one Anne used to great effect embellishing her blouse in episode 1 .  I adore the simple red, grey and white stripe ribbon too - a decorative touch without making it girly!  The button came from Nan's button box.


I lined it with a pale blue and white striped cotton and made the 'pages' with black felt.  Then I finished off the gift by filling it with a selection of gold plated needles.

He loved it!

So did I!! In fact I loved it so much I made a couple more...


This one uses Jane Means stitched gross grain ribbon in sage and the same narrow ribbon as before but this time in green. The lining fabric from my stash matches beautifully - right down to the stitched lines as part of the pattern!


I have used pale green felt for the pages and another vintage button holds it all together.


On this needle book I have used Jane's beautiful red ribbon with grey polka dots - it looks like it was made to go with this fabric!  The narrow stitched ribbon comes in red too and once again has been used for the button loop. A lovely etched button and matching red top stitching finish this one off nicely.


Inside I have lined it with gorgeous Lama Love by Monaluna Organics sold by one of my favourite fabric suppliers Seamstar (stay tuned - I have an upcoming blog post all about their great new monthly craft club!) It's cute and quirky and goes with the grey and red theme perfectly! Bright red felt pages hold your needles safely.

Both these needle books are available now from my Folksy shop priced £8.00 each. I am still offering free post and packing on ALL UK orders through Folksy so why not go take a look?

I feel there are few more needle books to be born from this fabric/ribbon/vintage button combo yet - perhaps you have a colour combo you'd like to see? I may have to create some matching pin cushions too...

Wednesday, March 27, 2013

Wrap it up...


I do love making presents - especially when I stumble across that special pattern/idea that would suit a special someone so perfectly it seems almost like divine intervention.

I love wrapping presents too

But what I love best is making the wrapping as much a part of the gift as the gift itself!


This was a pressie for my brother - he wanted a ravioli stamp, so that's what I got him. Not the easiest thing in the world to wrap. I suppose I could have found a box for it or put it in a gift bag but I had the idea that it would be nice to pair it up with a bag of good quality pasta flour.  Still there is the wrapping problem so I also got him a couple of tea towels ( you can never, ever have too many tea towels!) wrapped them around the the bag of flour and tied it all up with some lovely blue and white striped ribbon from my Jane Means stash.


The actual main part of the gift - ravioli cutter - wasn't even wrapped but tied in place with the ribbon!
I finished the whole gift off with a vintage map gift tag (you can get these as a free download from here) tied on with kitchen string.

He loved it!

I always find wrapping little things neatly (I am a stickler for neat when it comes to wrapping gifts) really difficult. You can either bulk it up with lots of tissue or find a suitable box to put it in then wrap that but too many layers and it becomes a bit like the 'pass the parcel' party game...


I found these adorable pillow box printables over at the delightfully named Picklebums blog. Simply print, cut out, score along the dashed lines, fold, add a little sticky tape/glue and done. I tied some blue stitched ribbon from Jane Means around the box to finish it off.

I love these simple stitched ribbons - they come in so many colours you are bound to find one that matches your wrapping.  Here's another I did, complete with one of those fab vintage map gift tags!


I always love getting gifts wrapped with proper ribbon  You can absolutely guarantee it will get carefully tucked away and used again.


Or is that just me?

Tuesday, March 19, 2013

So many projects, so little time...

I have so many little projects stacking up at the moment, when I get a little time to myself I hardly know which one to work on!

Here's a beaded necklace I am working on for my mum...


It's in lovely spring colours - fresh greens, blues and yellows. It is supposed to be a gift for her wedding anniversary next week. I hope I can finish it in time but beading work is so time consuming and the kitten always wants to join in...


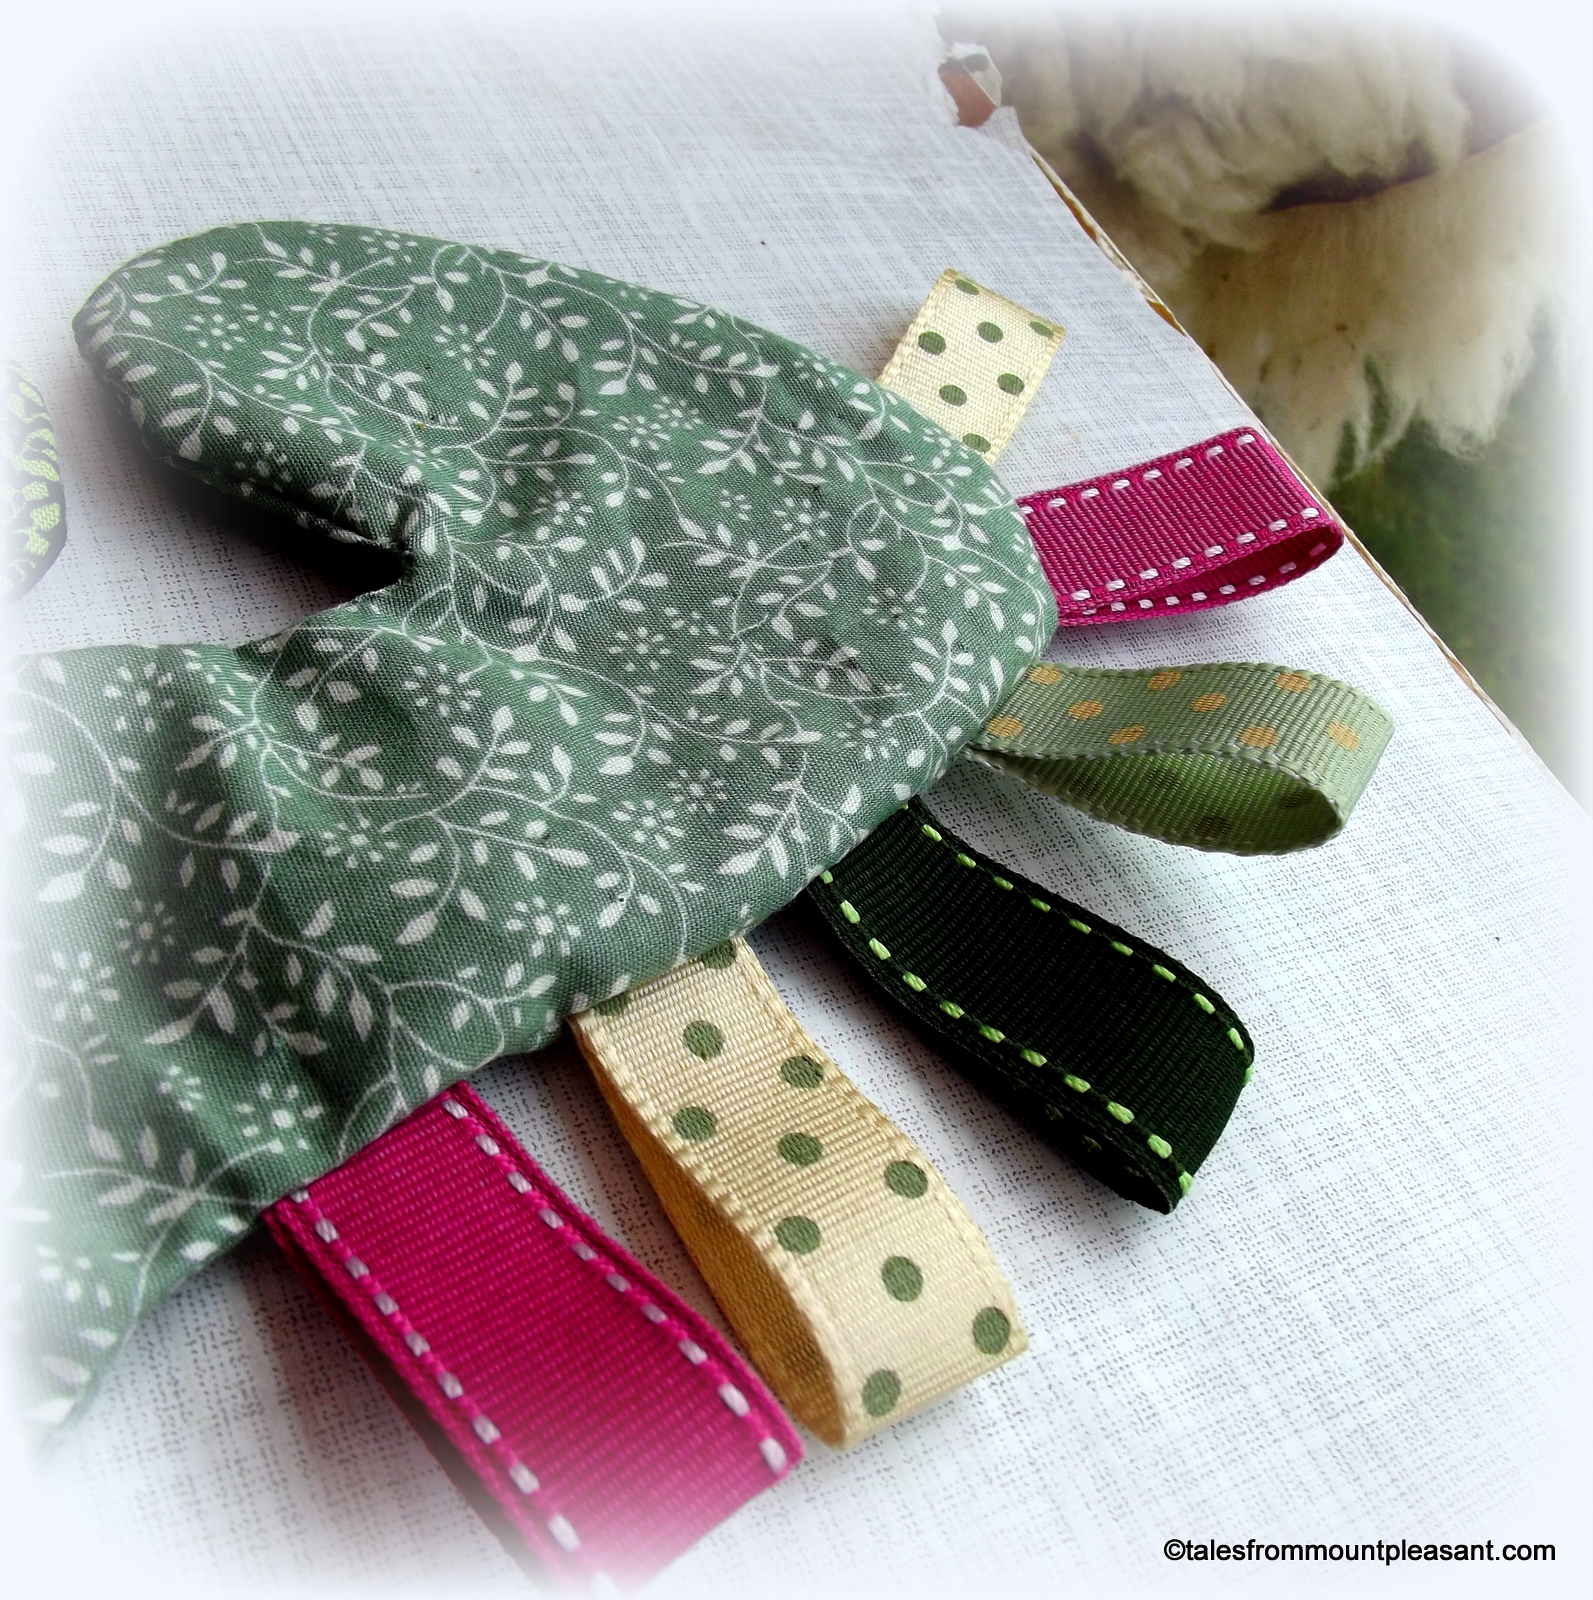
Then there is little dragon softie...  I made one of these for a newborn nephew of a friend and it proved very popular amongst my Forest Flower facebook page likers!  This one, also commissioned by a friend ( I have some fab friends!) is unashamedly girlie with green leafy patterns and gorgeous Tilda roses fabric.


I've used a selection of matching stitched and polka dot ribbons from my Jane Means stash to make the 'spikes' down this dragon's back - don't they look lovely?  

Another 'new baby' gift commission is this personalised star... for a little Star!


Made with the reverse applique technique I use for my popular heart decorations using felt with a pretty fabric insert embroidered with baby's name. I am really pleased with how this one turned out - I think it may be coming to my Folksy shop very soon!!

Finally I have a very cute Easter make as part of my Abakhan Creative Budget challenge. I am currently putting a little tutorial together for this make that will go live by the end of the week giving you just enough time to source some supplies and make for Easter weekend. I hope you like them!


phew...  now I just need a few extra hours - preferably while everyone else is asleep!!!

Tuesday, November 06, 2012

Woven Ribbon Lavender Pillow Tutorial

Now we have Bonfire Night out of the way, I guess it's time mention the 'C' word...

Let's not get too festive and sparkly just yet (no, really, plenty of time for that NEXT month!) but those of you who aspire to a Handmade Christmas really should start thinking pressies if you haven't already.  I have about 5 half completed pressie projects on the go at the mo. I'm not panicking. Yet.

I've raided my Jane Means ribbon stash again to come up with this stylish gift idea - and it's a great way to use any lavender you may have dried in the summer!


You will need a couple of meters of your chosen ribbon - I have used these lovely polka dot grosgrain ribbons in co-ordinating turquoise and chocolate brown - a couple of small pieces of fabric and some dried lavender.


First decide on the size of your pillow and cut out two pieces of cotton fabric approx 2cm larger than you want the finished size to be. Mine measures 10cm x 8cm finished so my base fabric pieces were approx 12cm x 10cm.

If your pillow is oblong, like mine, you will need to cut shorter lengths in one colour to fit the width and longer lengths in the contrast colour.  I used 7 x 10cm lengths of the turquoise ribbon and 6 x 12cm lengths of the chocolate brown ribbon.

Now, using one of the fabric pieces as your base begin weaving your ribbon strips. You may find it easier to pin the ribbons to the fabric or tack them in place around the edges as you go


Try and keep the ribbons matched up edge-to-edge for a neat finish. It's a bit fiddly but don't worry about it too much as you have the base fabric underneath to stop and lavender escaping the finished pillow!

When all the ribbon strips are in place and secure take you other piece of fabric and lay it, face down, on top of the ribbon panel. Pin, tack and stitch all the way around, leaving an opening in the middle of one long edge to turn the pillow the right way round.

Turn, stuff with dried lavender, stitch up the gap and you're done!!


These pillows are so easy to adapt too - use wider ribbons to make larger pillows. Use up your ribbon scraps and make a lovely colourful boho inspired pillow. Use all one colour for an elegent textured look.  You'll find loads of gorgeous ribbons on Jane Means website if you need any further inspiration!


Thursday, August 30, 2012

Ribbon scraps and gravy tubs...


Here's a quick and easy way to use up those ribbon scraps, recycle empty gravy granule tubs and organise your desk/craft space all in one go.


Measure around your chosen pot/canister/tub and cut lengths of ribbon just slightly longer (to allow for an overlap). Attach the ribbons to the container using narrow double sided sticky tape for an almost instant  makeover! You can use fabric glue if you prefer but you need to allow a little extra time for the glue to dry.

And that is it! I told you it was easy!

Keep hold of the lids and use your pretty decorated tubs to store craft supplies - buttons, ribbons, beads - or they make a lovely addition to your desk for paperclips or rubber bands. Without the lids they make great pen pots!


I used a gorgeous selection of ribbons in autumnal colours from my Jane Means ribbon stash for this stripy  pencil pot.


Alternatively wrap the canister in a lovely piece of fabric and glue in place. Add coordinating ribbon to the top and bottom to cover the fabric edges.


Chocolate brown and burnt orange Jane Means ribbon coordinates beautifully with this lush Saffron Craig owl print fabric. The taller canister lends itself beautifully to showing off this collection of wooden knitting needles! (my mums . . . although I may just *forget* to give them back!)


I think they look great and they are really are so easy peasy to do I may end up with ribbon covered storage pots all over the house.
I wonder if the Other Half would like one for his spanners . . .

Friday, July 13, 2012

Exciting news...

I have some exciting news to share - I have been selected - along with a dozen or so other fabulous bloggers worldwide - to be a Jane Means Ribbon Stylist Blogger!!! 

For those of you unaware of Jane Means, she is an internationally renowned gift wrapping expert and ribbon designer - what this woman doesn't know about ribbon, quite frankly ain't worth knowing.

I am over the moon to be joining her Ribbon Stylist Blogger team and literally jumped for joy when my lovely postie delivered my big box of ribbons this morning!


Just look!  Dotty, spotty, stripey, gingham, stitched and vintage denim ribbons galore! A selection of wired organza ribbons in just the most beautiful colours. There are even some brand new designs I am not allowed to show you yet as they haven't been officially released.


 I truly am in ribbon heaven! I am bursting with ideas - lovely things to make, tutorials to share and some ribbon styling ideas around the home to plan.


But first things first, it's my sister-in-laws birthday in a couple of weeks. Her presents are gonna have the best wrapping treatment ever!

*apologies for the not amazing pictures - Little Man was running around today with loaded paintbrushes - I just couldn't risk getting them out of the plastic wrappers!
Related Posts Plugin for WordPress, Blogger...
Blogging tips