Showing posts with label Crafty Stuff. Show all posts

Tuesday, July 30, 2013

Works-in-Progress Linky - I'll show you mine if you'll show me yours...

Welcome to the very first works in progress linky post - aka WIPsLinky!

I am really excited to get this idea up and running - I really hope that now you are here and reading you'll want to join in too.  If this is your first visit to my blog here is the post I wrote last week as an introduction to the WIPsLinky idea. Go have a read if you like. I'll still be here when you get back...

Hello again!

So I am going to show you a couple of projects I am working on right now - both of them seem a little incongruous given the warm weather we have been having of late but, as most crafters (particularly those who knit or crochet) know there is no point in waiting until it's cold to create things to keep you warm...

crochet in the park...
First up - I have had some Hayfield Bonus Galaxy yarn floating around for some years. I think I bought it with the intention of making something cute and snuggly for Roo when he was tiny but didn't get around to it. It's been discontinued so I am unlikely to be able to get any more and I only have 2 balls each of blue and green. So I am using a 5mm crochet hook and making a pile of basic closed granny squares - I have absolutely no idea how many my yarn will make or what I'll do with them when they are done ( Lap blanket? Cushions?) but it feels kind of good to finally be using something that has been stashed away for best part of 5 years!  When I have used up all the yarn I will make the decision.

I love that granny square projects are so portable, all you need is your hook and some yarn. Even if you are bit rusty, like me, you only need to make a couple with a pattern in front of you before you can whip them up without the pattern wherever you are!


Next up is one of those projects I have been waiting to start for a long time. The pattern came from my mum's collection of 'The Knitter' magazines. We love 'The Knitter' because it is aimed at more experienced knitters than most mainstream knitting mags and has some wonderfully challenging projects.


This one is a cabled blanket made up in panels of different sizes with lovely, intricate cable patterns on each panel. I adore cable knits - there is something inherently snuggly about a chunky cable knit don't you think? I love them so much I have a whole Pinterest board devoted to them!


Anyway, the biggest hold up has always been getting the yarn - this throw uses a lot of yarn - as is the way with all these patterns the specified yarn, although beautiful (50% wool/50% lama!) is WAAAAYYYY out of my budget! Luckily for me my mother-in-law had some rather nice wool mix arran yarn from Stylecraft in a beautiful charcoal grey colour - enough to knit this whole blanket in the same colour instead of a rainbow patchwork (although that would be nice too!).


I have started on the first panel - a long, thin strip of cabling that basically an 8 row repeat. It's not too complicated and doesn't require much concentration so it's good to do while watching tv. I have a feeling the large Celtic knot panels might require a bit more focus though!


We're off on holiday tomorrow so I will be taking this one with me, just in case the weather does it's worst. After all what is a holiday but an excuse to knit for hours on end without feeling remotely guilty?

So there you have my current Works-in-Progress - now show me yours!

Link up your #WIPsLinky blog post below. If you want you can add a link to this post at the end of your post (I am working on a 'grab my button' code. Honest!)

Please use the #WIPsLinky hash tag on Twitter/Google+/Facebook if you want to shout about this linky to your friends too! I will also be setting up a WIPsLinky pinboard on Pinterest.

I am looking forward to seeing what you are up to!

ps: the Linky will be posted on the last Tuesday of each month, the current one will stay open until the day before new one comes up so you have plenty of time to link up and join in!

Tuesday, July 23, 2013

A new linky - share your WIPs!

I blog a lot of tutorials in my role as a Jane Means Ribbon Blogger and an Abakhan Creative Budget Blogger, as well as new Forest Flower designs when I add them to my Folksy shop but I don't often take the time to show off the little (and not so little) projects I work on - usually in the evenings whilst watching TV or listening to music - little things for the home, for Roo, presents for friends and family and those new techniques or ideas I spot on Pinterest or between the covers of Mollie Makes...

Some of these projects are on-going (which means I have been working on them forever!) Others are what I call 'Sunday afternoon makes' - little things I rustle up while the boys are watching the motorcycle racing. There is usually at least one gift being made, if not for an upcoming birthday than to go in the Christmas box. Occasionally I even make something for myself!!

a current WIP - should be completed by next week's linky...

I thought it would be a nice idea to start up a works-in-progress (aka WIPs) linky where we can all share the projects we are working on, the projects we would LIKE to start, the ones we need encouragement to finish...

I am planning to post the WIPs linky on the last Tuesday of each month - so the first one will be next Tuesday 30th July - and the linky will stay the whole of following month so as many of you as possible can join in. I will be working on a little bit of coding so you can add a badge to your post to encourage your readers to head over to the linky and join in and maybe discover some new blogs in the process.

I hope that lots of my crafty blogging friends will take join in once a month. Linkys are a great way to discover new blogs so I hope that all of you who do link up take the time to check out the other blogs on the linky too!

#WIPsLinky will be announced on Twitter/Facebook/Google+ so please follow/like/add if you want to see the reminder or subscribe to the blog by email and it will be sent directly to your inbox.

I look forward to seeing all of your works-in-progress next week!

Saturday, July 20, 2013

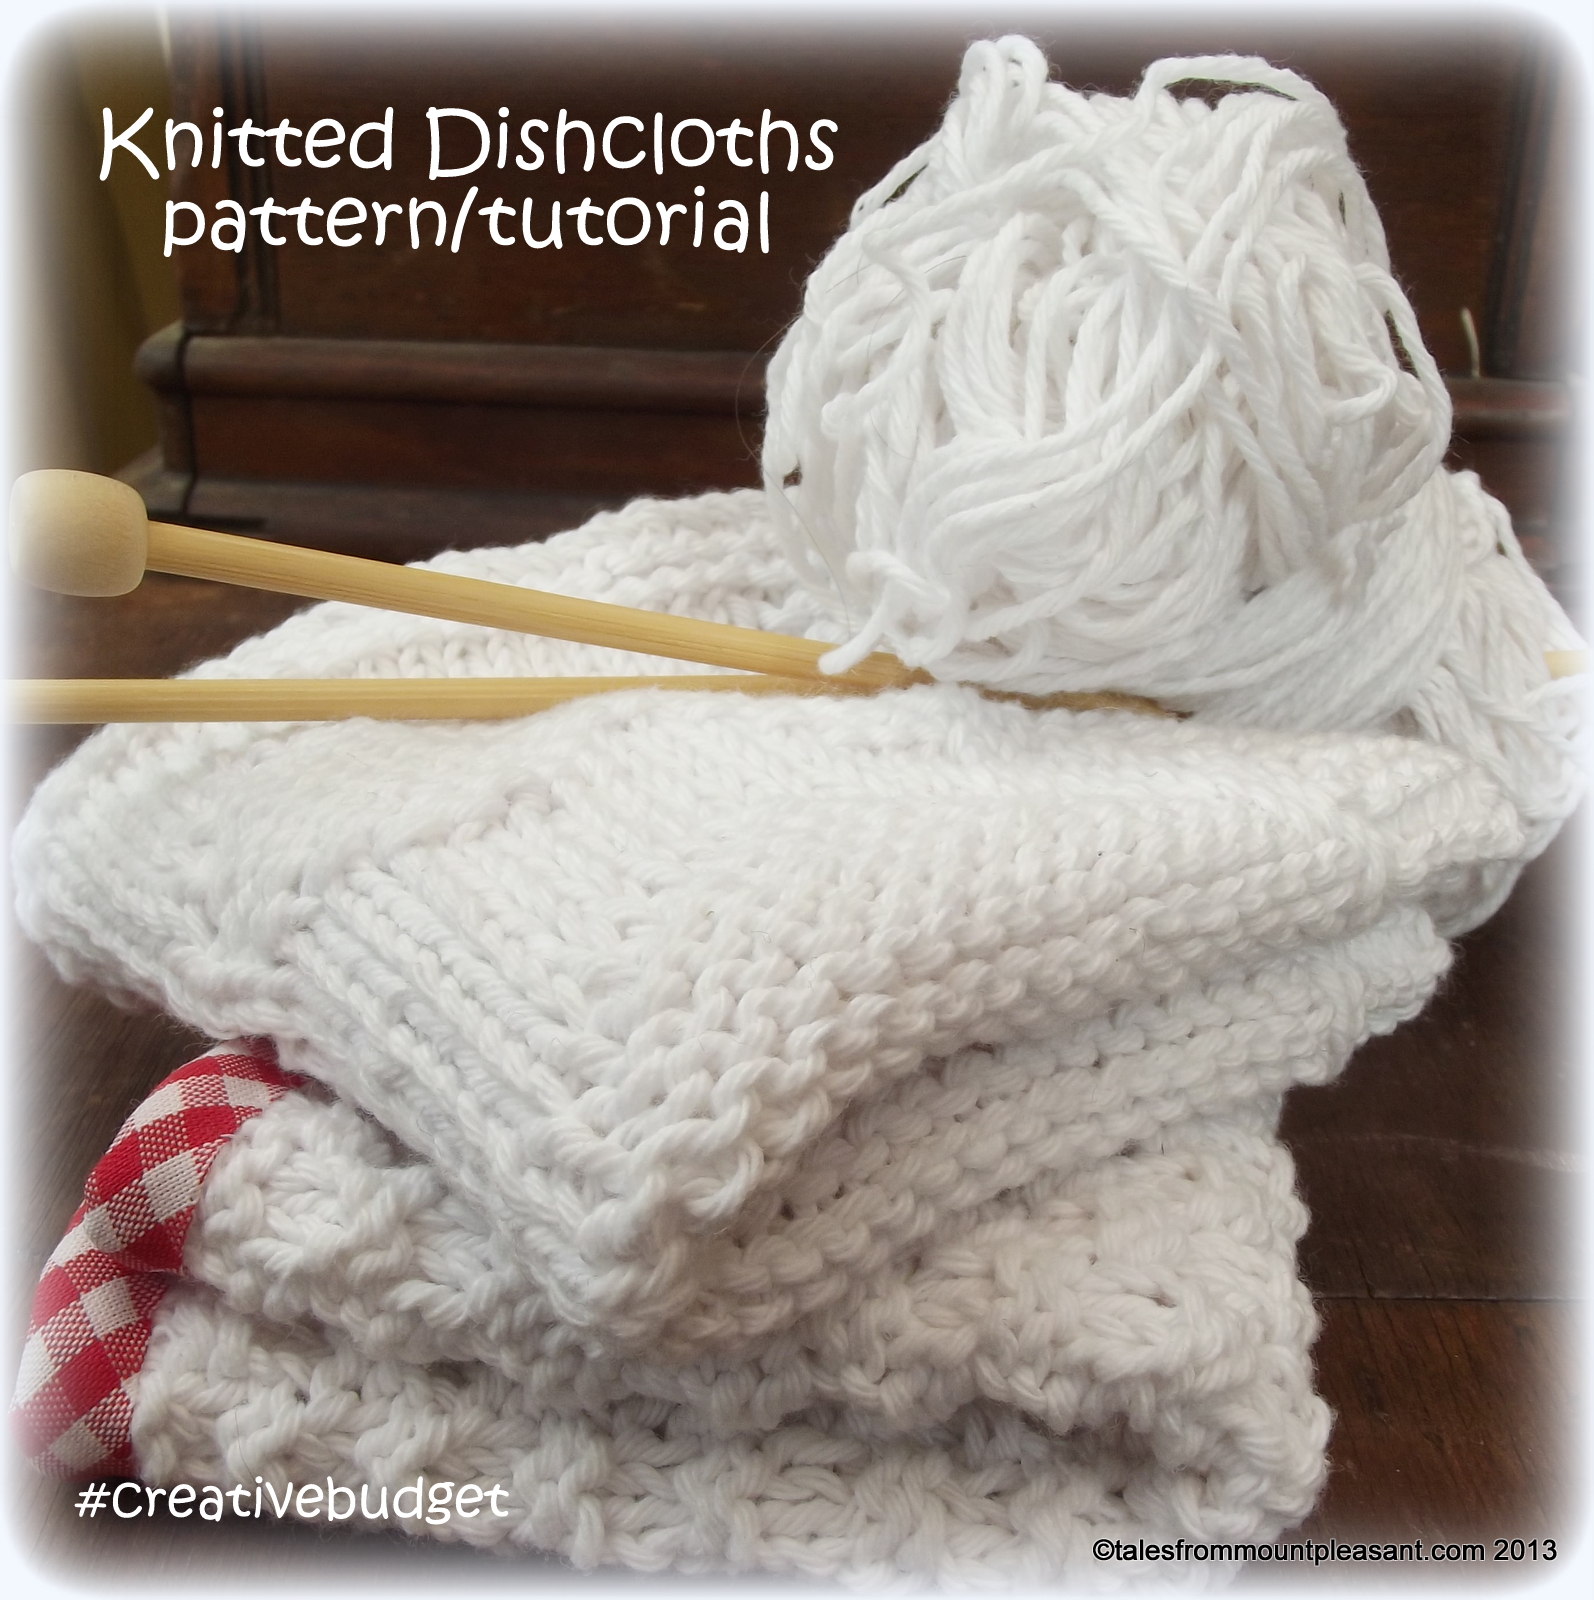
Knitted Dishcloth Tutorial

Here is the last part of my Creative Budget 'Kitchen makeover' series.  You'll need your knitting needles for this one!!

Don't panic though these two cute dishcloths really are very simple to make - if you can knit and purl you can rustle them up in a couple of evenings whilst watching the tv. If you want to learn how to knit so you can have a go there are many online tutorials. Here's a great one from Debbie Stoller, author of the 'Stitch 'n Bitch' book series. (It doesn't include purl stitches but there are many others that are easy to follow once you have the basic technique!)


Hand knitted or crochet dishcloths last so much longer than shop bought ones and look so much nicer drying over your dish drainer. Wash them regularly in with your tea towels to keep them clean (don't expect them to stay pristine and white for long though!). I have used craft cotton but any DK cotton would do. Or any DK yarn at all really. Use up what you have around the place and don't feel that you have to stick with white!

I made both cloths with one ball of craft cotton from Abakhan and there is probably enough left over for another cloth too (I may make another cloth with some of the pale blue polka dot binding I have left over from the pretty pot holder make) The simple basket weave effect pattern makes gives this cloth a good texture - excellent for getting those stubborn bits of food off your plates when washing up. The bias binding neatens up the edges nicely and adds a lovely finishing touch but it it completely optional - your cloth will work just fine without it!

Textured dishcloth with colourful binding

Using 4mm needles and craft cotton or another dk cotton yarn of your choice cast on 44 stitches

Row 1 : k2, p2 to the end
Row 2 : p2, k2 to the end
Row 3 : p2, k2 to the end
Row 4 : k2, p2 to the end

Repeat those four rows until your work measures approx 20cm (around 60 rows)

Cast off.

Sew in the ends.

Binding the cloth is easy using the same method as for my Pretty Pot Holder - start from one corner if you want to add a hanging loop like the pot holder or at the centre of one side for a neat finish with no loop. Stitch the binding by hand or machine if you prefer. When you get back to the start, tuck the end under and secure the overlap with a few extra stitches.


Heart Pattern Dishcloth

This cute heart patterned cloth is almost too pretty to do the dishes with! If you really can't bring yourself to use it in the kitchen it would also make a lovely face cloth. Wrap it up with some handmade soap - I love these by Saffronbarr - and you have a perfect gift for a friend!

Please don't be put off by the rows of numbers! It is only knit stitches and purl stitches. Just take each row at a time...

Using 4mm needles and craft cotton or any other DK cotton yarn cast on 45 stitches.

Row 1-7 : Knit
Row 9 : Knit
Row 10 : k5, p35, k5
Row 11 : k13, p2, k15, p2, k13
Row 12 : k5, p7, k4, p13, k4, p7, k5
Row 13 :  k11, p6, k11, p6, k11
Row 14 : k5, p5, k8, p9, k8, p5, k5
Row 15 : k9, p10, k7, p10, k9
Row 16 : k5, p3, k12, p5, k12, p3, k5
Row 17 : k7, p14, k3, p14, k7
Row 18 : k5, p2, k14, p3, k14, p2, k5
Row 19 : k6, p16, k1, p16, k6
Row 20 : k5, p1, k16, p1, k16, p1, k5
Row 21 : k6, p16, k1, p16, k6
Row 22 : k5, p1, k7, p2, k7, p1, k7, p2, k7 p1, k5
Row 23 : k7, p5, k4, p5, k3, p5, k4, p5, k7
Row 24 : k5, p3, k3, p6, k3, p5, k3, p6, k3, p3, k5
Row 25 : Knit
Row 26 : k5, p35, k5
Row 27 : Knit
Row 28 : k5, p35, k5

repeat rows 11-28 twice more.

Knit 7 rows and cast off.

Sew in ends.


There you have it - a simple way to pretty up your kitchen and make washing the dishes a little more pleasurable. Or a little less of a chore at least...

*Abakhan send me all the materials I need for my Creative Budget posts. No other payment has been received. All words, pictures and tutorials are my own.

Wednesday, July 03, 2013

Handmade Wedding bunting idea...

The other day I received a call for help from a friend of mine.

She has a family wedding coming up and the bride and groom, wanting a rustic, handmade feel for their big day, had requested that the guests each send a handmade bunting flag. Their idea is to stitch all the flags together to make a beautiful and totally unique addition to their wedding decorations.

What a wonderful idea!! Not only does this get everyone involved in their wedding preparations but at the end of it they have a gorgeous keepsake to remind them of their special day and all the people that came together to make it even more special.

But why did she need my help?

Well to use her own words "How does one sew?...(The whole family) know I can't even sew on a button!"

I hate to leave a friend in need and, lets be honest I don't need much encouragement when it comes to sharing crafty stuff!  I arranged to pop over and give her a hand. I wasn't going to make it for her, just give her a few pointers. Plus we get to drink lots of tea and have a natter too. Sounds like the perfect morning to me :-)

I took along a little bundle of materials and trimmings that fitted in with the 'rustic' theme. Fran wanted a natural look...

pretty crafty things....


Pretty natural fabrics, lovely cream and sage spotty ribbon from the Jane Means collection, some pretty pompom trim and a selection of vintage lace, buttons and embroidery threads.

We sat and talked ideas and Fran chose the base fabric she wanted. Then we set about appliqueing a gingham heart. Poor Fran's hands were shaking as she applied the first few stitches but she soon got the hang of it!

first tenative stitches


She added three rows of vintage lace trim, then we made a little bow with the spotty ribbon and attached it to the flag with a heart shaped wooden button.

buttons and bows

Now confident that, yes, she could actually sew on a button, Fran added a couple more and finished off the flag with some cute cream coloured pompom trim from Seamstar .  Once she was happy with her work she cut out the flag.

steady....

Fran was so pleased with her finished bunting...

proud crafter!

...and so she should be! The girl who said she lacked creativity and had absolutely no idea what to do and how to go about it, I think she did a pretty damn fine job, don't you?


The lucky couple have received the flag now and they love it too - it's going to look so pretty strung up with all the other handmade flags from their other guests!


It's such a fabulous idea and the perfect way to celebrate such a happy day :-)


ps - Fran agreed to have these pictures taken of her work in progress, just to prove to the rest of the family that actually, she can sew on a button. And more besides!


Monday, July 01, 2013

'Boost your stash' Giveaway Winner!!

Wow! I was a little overwhelmed by the number of entrants to my little giveaway!  I think one or two lovely people may have shared it on MSE as a lot of traffic came from there over the weekend! Whoever you are, thank you!

It took me best part of an hour to collate all the entries from here, facebook and twitter, writing all the names on slips of paper, folding them up ready for the drawer...

Let me introduce my special, utterly non-biased but very cute assistant - Roo


**Congratulations**

Mia Fergusson


Mia left this comment on the blog post and also entered via facebook and twitter
"i would love to win , there is so many things i could make but id love to give making teddy bears a try."
I would love to see what you do make with your new bundle, Mia!

Thanks to everyone who took part and if you would still love some of that beautiful fabric I have the fat quarter bundle for sale here at the special price of £9.99. I'll even refund the postage charge if you message me when ordering mentioning that you entered the 'Boost your Stash' giveaway.

Tuesday, June 25, 2013

Pretty pot holder tutorial

A few weeks ago I showed you my latest bundle of pretties from Abakhan and a tutorial for an easy peasy reversible tea towel.


Now I am going to show you how to make a really cute matching pot holder - an essential piece of kitchen kit if, like us, you have a stove top kettle (boy, does that handle get hot!).


You will need

  • 2 x 15cm squares of your chosen fabrics (make sure they are natural fibres - cotton, linen or wool - polyesters are really not a good idea near heat!)
  • 2 x 15cm squares of cotton batting/wadding or a couple of layers of old cotton towel 
  • bias binding
  • matching thread


Sandwich your squares together with both of your chosen outer fabrics right way out and layers of cotton wadding in between.

Using a ruler ( I used an old plastic 30cm ruler from school) mark out a diagonal grid on the fabric with light pencil marks, tailors chalk or vanishing fabric marker pen. Pin through the stack to hold it together then stitch along the lines - by hand or machine - to quilt your fabric.


If you have used a machine it should look something like this...


flip it over...


All quilted - it really is that easy!

Now to add the bias binding.  Start in one corner. Open up the binding and place the edge of the binding up against the raw edge of your quilted square.


Pin it in place if it helps and, using neat back stitches sew it into place along the crease, easing it around the corners as you go.


Try and keep the stitches small and even - you won't see them but it makes for a neater finish! You can machine stitch if you prefer, it is much quicker, but I find it much easier to get the corners right when I do it by hand!

When you get back to where you started leave a length of binding a couple of inches long - this will be turned into the hanging loop.   Now fold the binding over the raw edge of your pot holder and, using a whip stitch to catch the binding to the layers of fabric...


Again try and keep the stitches small and neat as you will see these ones and ensure the binding covers over the back of the row of stitching you did to attach the binding to the other side. When you get back to your first corner continue the whip stitches up the length of binding to catch the two sides together then fold it round to create a loop and stitch the end down


And there you have it - one pretty pot holder to match my pretty reversible tea towel!


I have enough fabric  and wadding left over to make oven gloves too - there are lots of tutorials online like this one from Liberty or maybe this double mitt from a little gray.  I promise I'll show you the result.

I do still have one more tutorial for you from the 'kitchen makeover' Creative Budget bundle - the knitty one I promised yesterday.  It's coming soon...


Monday, June 24, 2013

Sorry, I'm a bad blogger (but here's some lovely photos to make up for it!)

Well my 30 posts in 30 days challenge seems to have fizzled out somewhat embarrassingly.

I really thought I could do it.

I had a plan and everything!

But what I don't have is enough hours in the day...

I didn't even manage a Veg Box post last week - it was a lovely one too. We had a half a watermelon and some gorgeous cherries along with the more usual carrots, lettuce, chard, potatoes, a couple of leeks, tomatoes, green beans and some plums.

watermelon 


cherry anyone?


Would you believe I actually *forgot* to photograph the veg box before I put it all away? I know! Call myself a blogger? Tsk....

In my defence I was cleaning out the fridge when it arrived and I just automatically put the veg away as I was putting stuff back. But clearly it shows that last week at least I just wasn't in blogging mode!

I have been busy too! Last week I spent catching up on the housework and paperwork that had been ignored for the previous couple of weeks due to prepping for the Tintern craft fair and over the weekend I have mostly been making these...


A variation on the embellished lavender hearts - these are lavender free but embroidered with 'Best Teacher' and added button cuteness. They make perfect gifts for teachers (summer hols are only a few weeks away now!) These four are listed on my facebook page right now at a special price until 9pm Wednesday evening. Another four will be added tomorrow night until 9pm Thursday. Any left will then be added to my folksy shop.  

*end of sales pitch*

On Friday we rescued a bird that flew into our window. The poor thing was a bit dazed and confused so we made it a little nest with some moss and brought it inside - away from the cat! - to give it some time to recover. It's not often you get so close to a bird so obviously the camera came out...


Thankfully, after about 15 mins rest it recovered and flew off.  The cat was a bit miffed though!

I'll try and be a better blogger this week - I have at least one tutorial to share with you, this one is for knitty peeps, specially for those fairly new to knitting who want to have a go at something pretty, practical and not too time consuming.  And don't forget there is still time to enter my giveaway and win a lovely bundle of fabric, buttons, ribbons and lace!

And as for 30 posts in 30 days... well, technically there's still time, if I post twice daily for the next week but you won't hold it against me if I don't manage it will you?

Thursday, June 20, 2013

Giveaway - Boost your crafty stash!!


I promised you a little giveaway earlier in the month, just as a thank you for your continued support and as a little celebration of the fact that I have been writing in this little corner of the internet for four years now!

This one is for all you crafty people out there - or perhaps those of you who want to have a go at sewing some cute little things but don't know where to start. Or those of you who's main purpose in life is simply to build a stash... (or is that just me?)

I have put together a little bundle of goodies from my own stash just for you...


What's in the bundle?


A set of six fat quarters of lovely Tilda fabrics - perfect for patchwork, doll making and any number of small projects.


Ten 1 metre lengths of assorted ribbons, ric rac and some lovely vintage lace trim from my stash.


50 assorted buttons in pastel shades - mostly vintage/reclaimed but with a few new buttons too. There's hearts, flowers, shiny, matt and even one that looks just like a sweetie...


All together a pretty collection of items I think you'll agree!  


Want to know how you can be in with a chance of winning this beautiful bundle of crafty goodness?

How to Enter

  • Leave a comment below - why not tell me what you would do with all this crafty loveliness!
  • Tweet 'I'd love to boost my craft stash with @forestflower23's giveaway' with a link to this blog post
  • If you are on facebook, visit my Forest Flower facebook page, hit 'Like' and leave a comment on the 'Boost your stash Giveaway' post pinned to the top of the page. 
  • Share the facebook post with your friends for an extra entry too!
That's a total of four chances to win!

This competition will run until midnight on June 30th. I will announce the winner on Monday 1st of July so make sure you keep an eye on the blog, facebook page or my twitter feed to see if it's you!

Good Luck!


Saturday, June 15, 2013

Craft Fair at Tintern

So, today I did my first craft fair of the summer, sharing a table with my friend, craft fair newbie, Marie.  Under the name Miss Willow, inspired by her beautiful baby girl, she makes lovely kids dresses and fab baby hats. 

Sharing a craft fair table with a friend when you first start out is a great way to dip your toes into the water and is much less scary than doing it on your own! Neither of us sold masses but it was a lovely day with lots of chatter, meeting some new customers, making new contacts and eating biscuits :-)

Plus I got to have lots of cuddles with THE cutest baby ...


The eponymous Miss Willow

Tintern is a small village on the banks of the River Wye situated between Chepstow and Monmouth, famous for its fabulous Abbey ruins that have inspired artists and writers for centuries.


The view from the window behind our table.


Good ol' village craft fair advertising (balloons are NOT optional!)


Our table - Forest Flower on right, Miss Willow on the left


Cute Owl dress by Miss Willow


After setting up my table I went for a little stroll across the cricket field to admire Tintern Abbey before the tourists arrived.

When I got back all the other stalls were set up...


sweet crochet baby shoes


This table was full of toy dogs modelling the funkiest dog coats!


Colourful tissue flowers


There were several stalls selling antiques and collectibles - I nearly bought this entire vintage alarm clock display!


Pretty vintage hand painted ceramic door plate (this nearly came home with me too!)


A selection of beautifully restored chairs and stools

A lovely day in a lovely location with lovely company.

And although I didn't sell a huge amount of stock at least I have some lots of pretty new things to add to my Folksy shop next week!
Related Posts Plugin for WordPress, Blogger...
Blogging tips