Saturday, November 17, 2012

Back to Business...


Now the Little Man is properly settled into school and I have caught up on all the paperwork that didn't get done over the summer, I am finally getting back to my sewing and giving Forest Flower Designs the attention it has been craving all year.  Yes I let things slide a little but now I am back!!

After an absence of several months, I have re-opened my Folksy shop. I must admit I am enjoying the 'new' Folksy very much. It looks sleeker and more contemporary and from a sellers point of view, much easier to use. I really love that they have fully embraced the Pinterest phenomenon too! Just create a board of Folksy pins (with Folksy in the title so they can find it) and if you're lucky your selection may make the home page! My '50 Folksy Shades of Grey' pin board was featured last week and I had a lovely message of thanks from one of the makers on my board whose featured item sold the same day! 
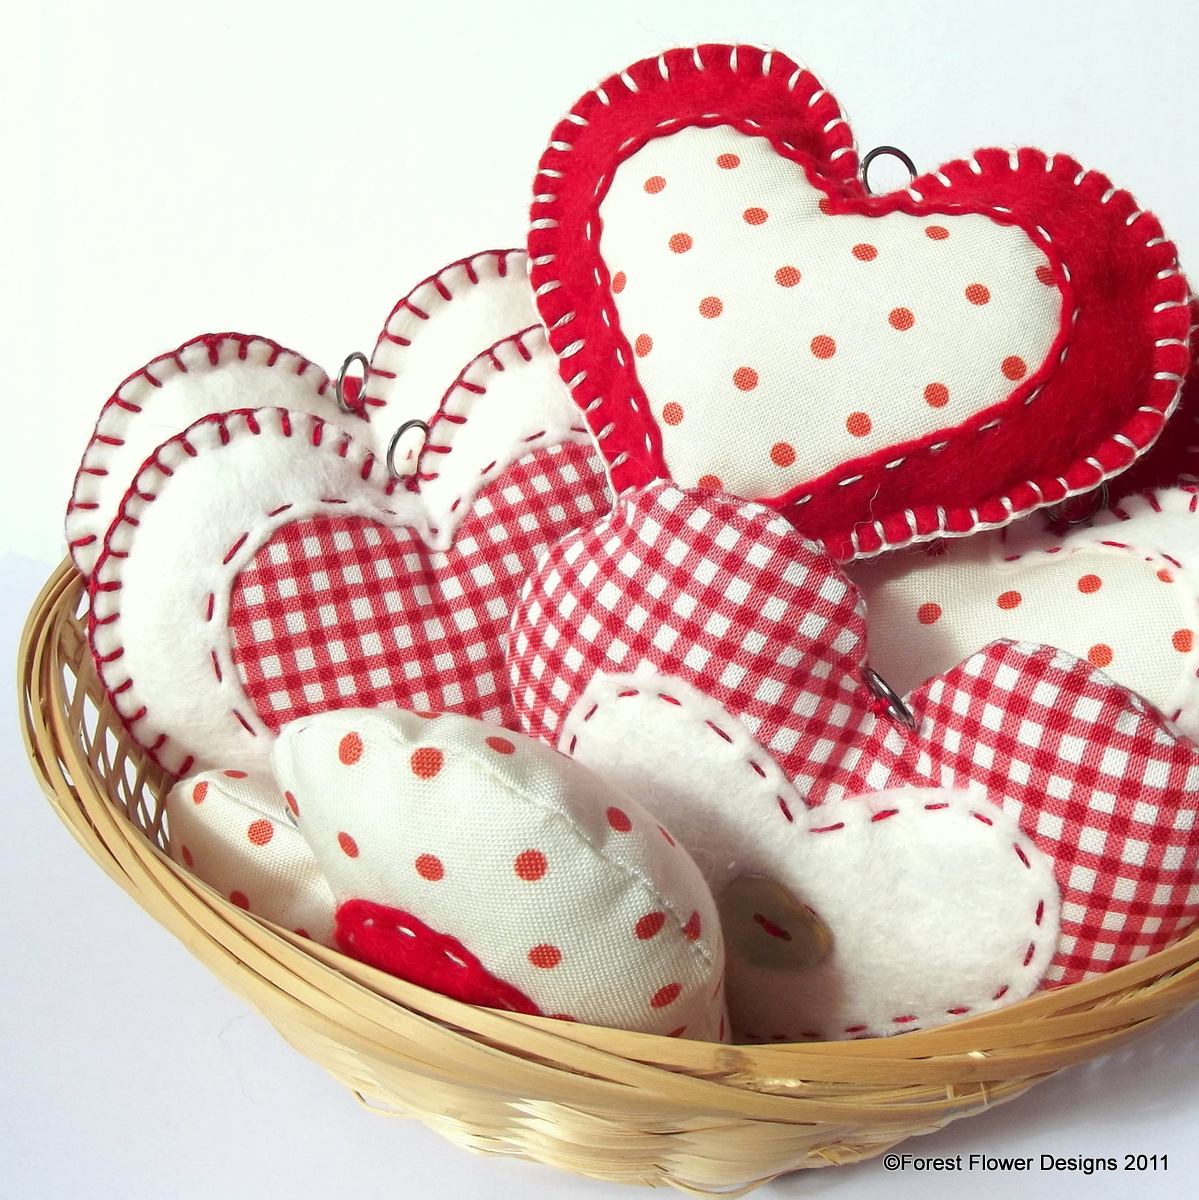


I have added some of my Rustic Country collection hearts and birds this week - these were best sellers last year and are just perfect for those of you looking to create a Nordic style red and white Christmas decorating theme...


Rustic Country Collection felt birds


My favourite red felt and gingham heart was featured on the Folksy home page this week thanks to Melissa's Ceramics pinboard.

Brand new items listed are these two fab drawstring pouches - fully lined and featuring metal eyelets for the drawstring.


Skull and crossbones pouch - fill with gold doubloons for your little pirate's stocking. It can be used to carry treasure around long after the chocolate coins have been snaffled!!


Pretty fairy princess pouch - adorned with fairies, butterflies, glittery crowns and cute castles and lined with the loveliest patchwork print fabric in candy colours, your little princess will just love finding this in her stocking. Fill it with hair accessories or jewellery as well as chocolate!

I have two more designs in production (hope to list next week). One is a mermaid theme - gorgeous mermaids swimming against a back drop of turquoise blue with a fab multi coloured stylised fish scale print lining. The other is a farmyard design featuring ducks, cows, pigs, chickens and tractors! With a colourful spotty lining and a cow print drawstring channel this one is great for younger children (or wannabe farmers of any age!)

Mini bunting banners to match are also in production and I hope to list those very soon too!

I have some other products I am very excited about too (if you like my Forest Flower Designs facebook page you may have already spotted them)  I will share those with you here when I am ready!

I am also offering free post and packing throughout November to all my UK Folksy customers so there's never been a better excuse to treat yourself! 


Friday, November 09, 2012

Hello Canvas Review

I recently became a aware of a company called HelloCanvas. Set up in 2004 and now the largest web based company of it's kind in the UK, HelloCanvas specialise in turning your favourite photographs into beautiful works of art for your walls.  You just send them your digital image and they will print your photo on canvas and deliver it to you in super quick time. They can also scan a real photograph for you and print that onto canvas too so you can even transform your pre-digital memories!

A short while ago I received an email from Mark of HelloCanvas. 'Send us your best photo - one you think we can not match the quality' he wrote.

So I did . . .

The picture I chose was one from the series I took on our little stroll around Newent Lake the other week. I adore the autumn colours on this image and was keen to see how the process would cope with that level of colour. The picture was actually taken on my mobile phone (5MP camera) rather than my regular camera so it was interesting to see how well the image would cope with being blown up to 50cm x 70cm.

I couldn't be more pleased with the result!


This photo really doesn't do it justice - it looks stunning! So far the comments have ranged from 'Just...Wow!'  to 'Can I have one?'  but everyone agrees that the quality of the print is brilliant, as is the price (a canvas print this size will cost you £37 with no hidden postage and packing costs ).

The canvases are of the highest quality and printed with UV-protected inks so you know your canvas will look as good as the day the picture was taken for years to come.

But don't just take my word for it, why not try them out for yourselves? Here is an exclusive code for my lovely readers - that's you! - for an extra 5% off their already excellent prices. Just add the code LBMAR2012  at the check out.  

You can follow HelloCanvas on Twitter and Facebook to keep up to date with new products, competitions and special offers.

*disclosure - I received my photo canvas for free in return for this review but all words, pictures and opinions are my own!

Tuesday, November 06, 2012

Woven Ribbon Lavender Pillow Tutorial

Now we have Bonfire Night out of the way, I guess it's time mention the 'C' word...

Let's not get too festive and sparkly just yet (no, really, plenty of time for that NEXT month!) but those of you who aspire to a Handmade Christmas really should start thinking pressies if you haven't already.  I have about 5 half completed pressie projects on the go at the mo. I'm not panicking. Yet.

I've raided my Jane Means ribbon stash again to come up with this stylish gift idea - and it's a great way to use any lavender you may have dried in the summer!


You will need a couple of meters of your chosen ribbon - I have used these lovely polka dot grosgrain ribbons in co-ordinating turquoise and chocolate brown - a couple of small pieces of fabric and some dried lavender.


First decide on the size of your pillow and cut out two pieces of cotton fabric approx 2cm larger than you want the finished size to be. Mine measures 10cm x 8cm finished so my base fabric pieces were approx 12cm x 10cm.

If your pillow is oblong, like mine, you will need to cut shorter lengths in one colour to fit the width and longer lengths in the contrast colour.  I used 7 x 10cm lengths of the turquoise ribbon and 6 x 12cm lengths of the chocolate brown ribbon.

Now, using one of the fabric pieces as your base begin weaving your ribbon strips. You may find it easier to pin the ribbons to the fabric or tack them in place around the edges as you go


Try and keep the ribbons matched up edge-to-edge for a neat finish. It's a bit fiddly but don't worry about it too much as you have the base fabric underneath to stop and lavender escaping the finished pillow!

When all the ribbon strips are in place and secure take you other piece of fabric and lay it, face down, on top of the ribbon panel. Pin, tack and stitch all the way around, leaving an opening in the middle of one long edge to turn the pillow the right way round.

Turn, stuff with dried lavender, stitch up the gap and you're done!!


These pillows are so easy to adapt too - use wider ribbons to make larger pillows. Use up your ribbon scraps and make a lovely colourful boho inspired pillow. Use all one colour for an elegent textured look.  You'll find loads of gorgeous ribbons on Jane Means website if you need any further inspiration!


Monday, November 05, 2012

Craft Fair Conundrum...

This weekend we (that is me, the Little Man and MIL) had a table at a popular local craft fair - we tried to get into this one two years ago but was told in September that we had applied to late (for the end of November!) so last year we made sure we booked in August. Several people had told us it was a 'BIG ONE', a popular fair that was well supported and always busy.  So we hoped we would do well with our mix of my designs and my Mother in Law's hand knits plus some little gift items from her daughter's shop.  We sold nothing. At. All.

craft fair table display
Maybe it was a one-off. The weather was bright on the day but there was snow on the ground which may have kept people away. Everyone was lovely, the atmosphere was friendly, the home cooked food available from the hall kitchen was fab. But not one person wanted to take anything we had to offer home with them..

We thought we would try again this year. Beautiful weather (no snow this time), same lovely atmosphere and definitely a few more people. This year we sold a few items but once coffee and lunch was factored in we barely covered the cost of fuel...


And this, I'm afraid, seems to be the case with most craft fairs we attend. People look. People 'oooo' and 'aaaahhh' and comment how beautiful this is or how much so-and-so would love that, but people don't buy! It's enough to make me cry with frustration!! The matter is not helped by hobby crafters turning up with their hand knitted blankets they are selling for under a tenner . . .

Do people really not realise how much TIME these things take to produce, how much supplies actually cost? Or have they been so blinkered by stupidly cheap supermarket buys (mass produced in India/China by workers who get paid pennies for their work so supermarket profits on these items are far in excess of anything I would expect to make on my handmade items...)  that they simply do not truly value craftsmanship anymore?

beautiful handmade porcelain star
I spoke to one lady who produced the most gorgeous ceramic buttons - she actually apologised to someone for charging £1 per button! Everyone of her items was an individual work of art and she felt the need to justify what is, in reality, a bargain price (look at the price of buttons next time you are in Hobbycraft if you don't believe me!)  I purchased four beautiful porcelain hanging star decorations from her for £1 each and I very much doubt I will find anything so lovely in Tesco...


This is not the first fair I have done, I probably have a dozen or so under my belt now, and it probably won't be the last but I have yet to have a truly successful fair. One where I felt that the people browsing were actually there because they want to purchase unique items, hand crafted with love and skill. Maybe we need to move further afield. Maybe we need to pay more to attend 'premium' fairs. I don't know...

I don't know if the story is the same where you are? Have you ever set up a stall at craft fair and left feeling despondent? Do you worry that your craft simply isn't good enough? Or maybe you have had great success at the fairs you have attended. Maybe you go as a punter and are disappointed with the goods on offer or just go along to support your mate who has a table but rarely buy.

Let me know your thoughts on craft fairs - from either side of the table. 

It may make the difference to me and others as to whether the next fair is a successful one or the last one . . .

Wednesday, October 31, 2012

Making it up as I go along...

I am a little bit proud of myself. This weekend I managed to knit a pair of gloves for the Little Man, completely to his specification WITHOUT an actual pattern to follow. That is a written, tried and tested by somebody else kind of pattern anyway...

It was definitely cold enough for gloves when we went out on Saturday but rooting through the hats/gloves/scarves box (aka Little Man's dressing up box) and could not find one pair of gloves that matched AND fitted him so he ended up with a pair of fluffy mittens which spent most of the day in his pockets not on his hands which meant he spent most of the day with cold hands!

'I want some like yours mummy' he said pointing to my wrist warmers, 'but not sparkly!'

So I let him pick some yarn. After steering him away from the lime green acrylic - there are some places I just won't go! - he chose a nice blue-grey with coloured flecks. We took the yarn home and I set to, ploughing through my patterns to find what he wanted. Nothing.  Had a look on Ravelry for free downloads and couldn't find anything there either.  So I bit the bullet, grabbed a pen and some paper and made my own pattern.

He wanted a longer cuff than normal (kids gloves are always too short at the wrist don't you think?), he wanted a thumb but he didn't want fingers. And he want the top left open, 'So I can eat sweeties without getting fluffy bits in my mouth!'  I wanted to knit them in the round using double pointed needles so there was no sewing up afterwards...

I used a basic mitten pattern as a starting point for number of stitches to cast on and also for shaping the thumb gusset but after that I kind of made it up as I went along (writing it down so the other glove would match of course!)

I can't begin to tell you how satisfying it was once they were finished (in one day too!) and Little Man put them on, then didn't want to take them off!  He proudly showed them off to his teachers when he went back to school yesterday.

And now I am proudly showing them off to you!


Monday, October 29, 2012

Autumn Glory

I don't know what the weather was like your way over the weekend but on Saturday we were treated to the most glorious sunshiney day that was a welcome respite to the damp gloominess that has greeted us each morning for the past week or so.

We went over to Newent for the day and had a lovely time hanging out at the Shambles, taking a stroll round the lake, feeding the ducks and having a mooch round the charity shops.

The trees around the lake were looking pretty spectacular, the fiery colours enhanced by the clearest, brightest blue sky you could wish for...


 Fiery orange and crisp turquoise - the best colour combos can be found in nature!  (OK so this pic has been *slightly* enhanced. But only coz the camera on my phone simply couldn't cope with the dazzling colours!)


My favourite picture of the day. I love the way the light filters through the tree canopy and the path disappears over the ridge inviting you to follow...

We had a lovely time exploring the little tracks that wind around the lake - for a park that is sandwiched between two housing estates, the town centre and the main road to Gloucester it was remarkably peaceful and really felt like we were in the middle of the forest!


 Later on I stocked up on some lovely charcoal grey aran yarn to make a cosy cabled patchwork blanket I have been wanting to knit for several years. It will be a project for next year - or maybe something to start in the Christmas holidays once I have all the present making out of the way  (more on that in another blog ) 


And what was waiting on the door mat when we got home?


The perfect ending to a perfect Saturday!

Friday, October 12, 2012

Veggie Box Meals - A Friday night curry

We are starting to get into the routine of school here now, although we still haven't quite got the hang of the morning bit yet and it usually involves a bit of shouting at each other 2 minutes before we have to leave!

One big change I have noticed is that the Little Man's appetite seems to have really perked up and plates are being cleared every night instead of just when it's cheesy pasta for tea . . .  I put it down to all the extra fresh air and having opportunities to use his brain more!  I'm not complaining. It's nice to know that my cooking efforts are not wasted, and unlike his Daddy, who would happily live on beans on toast and pizza forever more, Little Man is happy to give my veggie box recipes a try.

This scrummy curry went down a treat!

Veggie Box Curry

One large onion, chopped finely
One large potato, diced
A couple of carrots, sliced
Diced flesh of small squash
One small cauliflower chopped into bite size florets
A tin of chick peas, drained
A carton of passata (sieved tomatoes) or a couple of tins of chopped tomatoes
Some curry paste (I used Balti paste but Rogan Josh works well too)
Veg stock cube or 2 tsp Marigold Vegetable Bouillon

A big pan with a lid to cook it in!


Fry the onion in a little vegetable oil until it soft and golden, then add the potato and carrot and stir in some curry paste - add as much or as little as you like. I used a generous tbsp - enough to provide some spicy flavour but not so much to put the Little Man off!

Add the passata/tomatoes. Give it a good stir then add the cauliflower florets, squash and chick peas.

Crumble in the veg stock cube and add a little water to loosen up the mixture then put on the lid and leave to simmer for half an hour (or until all the veg is tender) stirring occasionally and adding extra water if needed.

Serve with rice (a plain version of the baked Gourmet Rice recipe here works well - just use chopped onion and some pilau rice seasoning with the rice) or naan bread.  For a milder version add some natural yoghurt to the curry just before serving, or put a pot on the table for those who want to add it themselves!

Little Man tucking in to (cold) photoshoot curry... it's THAT good ;-)

As it's just the two of us eating this it went a LOOOOOONG way - a tub in the fridge for later in the week and a two servings in the freezer for those days when I just don't want to cook. It's a great way to make the most of your veggie box as you can add just about anything - sweetcorn, beans, peas and greens could all go in quite happily. You could use fresh tomatoes (skinned and chopped) , sliced courgettes, mushrooms and peppers too - just remember some vegetables don't need to cook as long as others!

I am adding this recipe along with others as I find them to my Pinterest board 'Veggie Box Recipes'. This week I got some surprise broad beans in the box so I have been searching for some 'not-too-summery' recipes to use those in - I love them double podded with pesto and pasta and a bit of Parmesan cheese, but it's always nice to find a new way of eating a favourite food!

Why not have a look, for some Veggie recipe inspiration (although not necessarily Vegetarian, I hasten to add!)? I would love it if anyone wanted to join in pinning their own veggie box recipes - just give me a shout and I will add you as a pinner for that board! 


Related Posts Plugin for WordPress, Blogger...
Blogging tips