 A few weeks ago I showed you my latest bundle of pretties from Abakhan and a tutorial for an easy peasy reversible tea towel.
Now I am going to show you how to make a really cute matching pot holder - an essential piece of kitchen kit if, like us, you have a stove top kettle (boy, does that handle get hot!).
You will need
- 2 x 15cm squares of your chosen fabrics (make sure they are natural fibres - cotton, linen or wool - polyesters are really not a good idea near heat!)
- 2 x 15cm squares of cotton batting/wadding or a couple of layers of old cotton towel
- bias binding
- matching thread

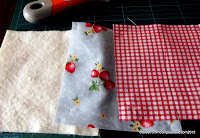
Sandwich your squares together with both of your chosen outer fabrics right way out and layers of cotton wadding in between.
Using a ruler ( I used an old plastic 30cm ruler from school) mark out a diagonal grid on the fabric with light pencil marks, tailors chalk or vanishing fabric marker pen. Pin through the stack to hold it together then stitch along the lines - by hand or machine - to quilt your fabric.
If you have used a machine it should look something like this...
flip it over...
All quilted - it really is that easy!
Now to add the bias binding. Start in one corner. Open up the binding and place the edge of the binding up against the raw edge of your quilted square.
Pin it in place if it helps and, using neat back stitches sew it into place along the crease, easing it around the corners as you go.
Try and keep the stitches small and even - you won't see them but it makes for a neater finish! You can machine stitch if you prefer, it is much quicker, but I find it much easier to get the corners right when I do it by hand!
When you get back to where you started leave a length of binding a couple of inches long - this will be turned into the hanging loop. Now fold the binding over the raw edge of your pot holder and, using a whip stitch to catch the binding to the layers of fabric...
Again try and keep the stitches small and neat as you will see these ones and ensure the binding covers over the back of the row of stitching you did to attach the binding to the other side. When you get back to your first corner continue the whip stitches up the length of binding to catch the two sides together then fold it round to create a loop and stitch the end down
And there you have it - one pretty pot holder to match my pretty reversible tea towel!
I have enough fabric and wadding left over to make oven gloves too - there are lots of tutorials online like this one from Liberty or maybe this double mitt from a little gray. I promise I'll show you the result.
I do still have one more tutorial for you from the 'kitchen makeover' Creative Budget bundle - the knitty one I promised yesterday. It's coming soon...


Thanks for sharing this! Have you ever used insulbright? I think using old towels is a great idea, as I have a lot and I need some new potholders {she says, nursing yet another burn ;)}
ReplyDeleteIsn't that he stuff with the shiny side? I thought it might be a bit crinkly!! Bet it's great for ironing board covers though...
DeleteOoh! Thanks for the bias binding pictures! My mother's been trying to explain to me how to use it for the last six months!
ReplyDeleteThese are gorgeous, and I love the red & blue together. They look so neat - I tend to avoid hand sewing at all costs, but I should rethink, it makes for a much better finish! The Sew4Home website has lots of tutorial and inspiration for sewing home items, just in case you haven't come across it before :-)
ReplyDeleteThanks for that tip Angela - I will go and check it out!
Delete